
A spreadsheet is a genious invention with many uses. It is often considered the application that turned the microcomputer from a hobby for computer enthusiasts into a serious business tool. It's an awesome way to work with tabular data and to do calculations and visualize data.
Another very common use of spreadsheets is to store business data. "I created a spreadsheet with our customers and suppliers and uploaded it to Sharepoint". "I put the sales leads in a spreadsheet and shared it with you on Google Docs". These types of quick-fix spreadsheets slowly becomes permanent and starts to proliferate quickly, leading to a situation referred to as "Excel-Hell".
In many cases, the remedy for "Excel-Hell" is a database. In this article we provide an easy to follow walkthrough for transferring your spreadsheet "systems" into a modern cloud database1.
Why should we use a database?
Most well known database technologies has some or all of the following features:
- Data quality and consistency
- A data schema with a detailed description of all data resources and properties
- Automatic data validation according to the data schema
- Row/document locking to prevent data collision
- Access control
- Define access roles to allow/prevent read, write, delete on resources
- Allow users to have private data views of shared resources
- Data relations
- A data schema that defines logical relations in your data, e.g: resource People.projectID refers to resource Project.ID
- Query language
- A structured language that enables abstract queries like: find "needle" in "haystack" where "needle.ID" is 42
- API
- A REST API for platform agnostic data access and integration
- A Platform specific SDK
The rest of this blog post is a step by step tutorial on how you can migrate from spreadsheets to a fast and consistent NoSQL cloud database using RestDB.io.
This tutorial will learn you how to:
- Prepare and export spreadsheet data
- Import data
- Map data relations and formula / logic
- Set up users and access roles
- Publish some data to the web
1. Prepare and export spreadsheet data
Imagine that we have a spreadsheet "database" for sales of vintage Apple products. The spreadsheet has 3 sheets; Customers, Products and Sales. We see that the Sales sheet mimics database functionality by referring to a CustomerID and a ProductID.
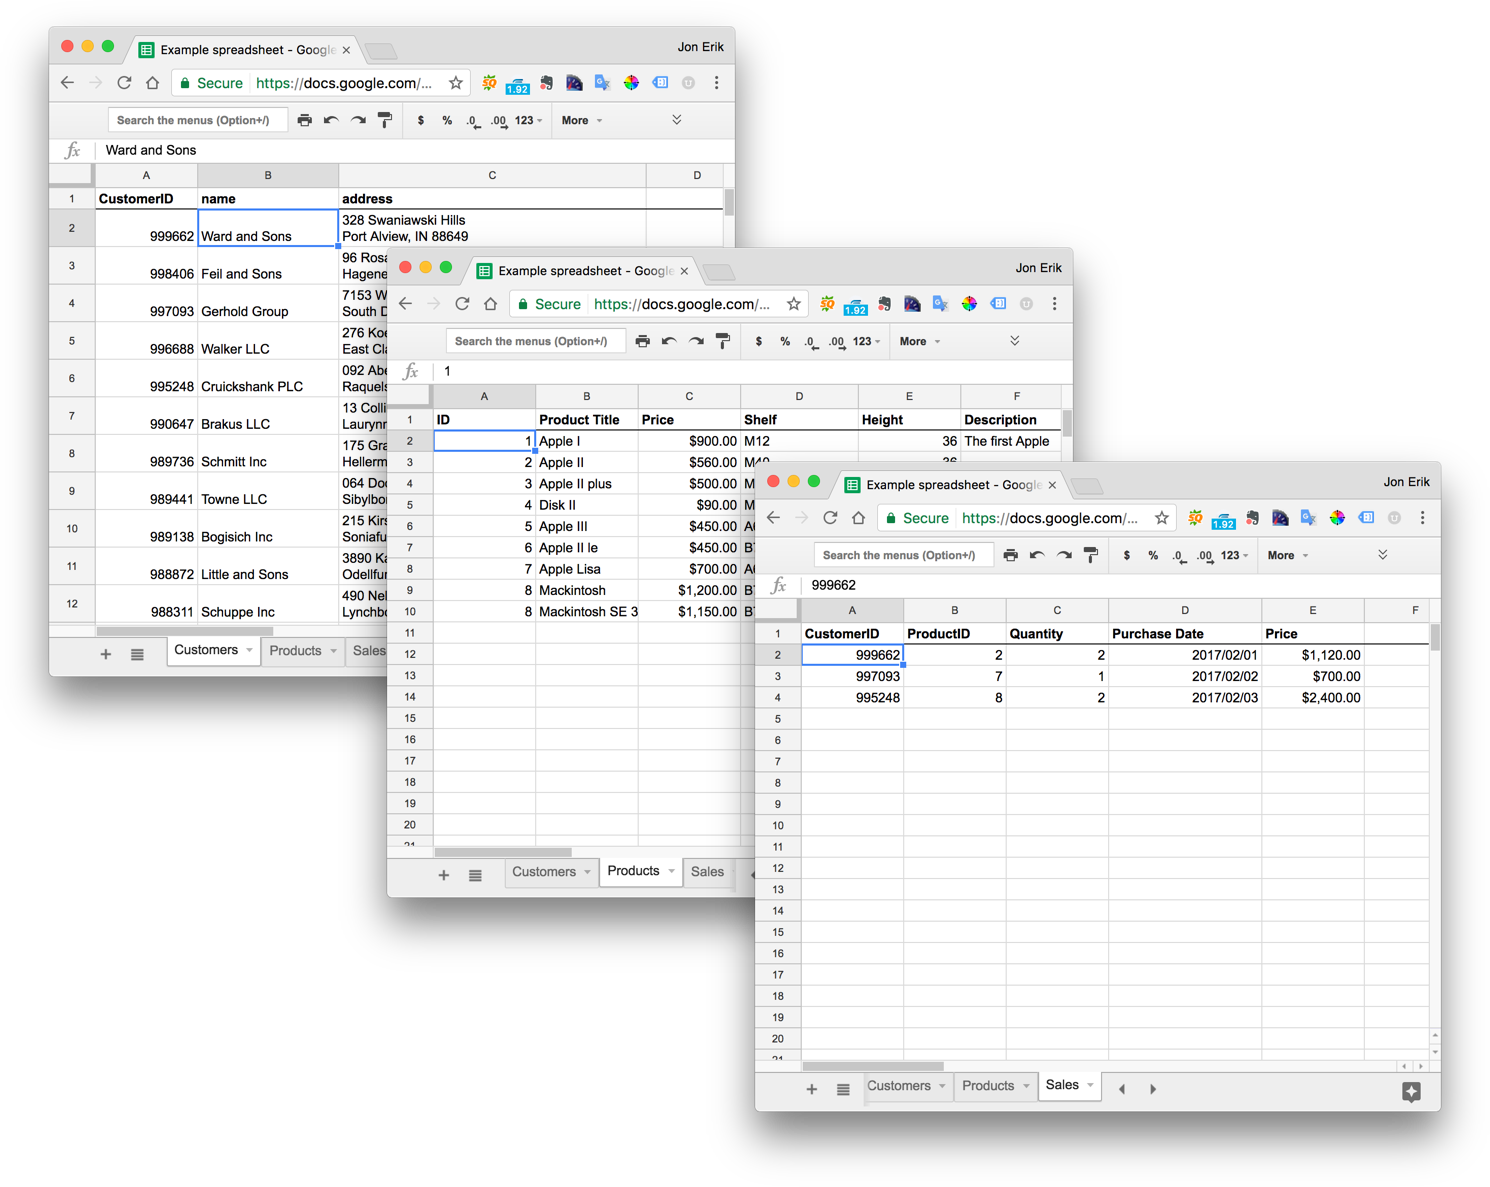
Before exporting the data, make sure that the first row of each sheet has a valid name. This will be the fieldnames in our new database. We export each sheet as a separate CSV (comma separated values) or Excel file.
E.g. the content of our exported Sales.csv file looks like this:
CustomerID,ProductID,Quantity,Purchase Date,Price
999662,2,2,2017/02/01,"$1,120.00"
997093,7,1,2017/02/02,$700.00
995248,8,2,2017/02/03,"$2,400.00"
Note that the important first row has valid column names. But the Price column doesn't seem correct.
Pitfall 1 - currency formats
Exports to CSV with currency formats can often result in a string like "$1,120.00" instead of a valid number 1120.00. Change column format to automatic before exporting.
# changed currency format to automatic number format
999662,2,2,2017/02/01,1120.00
…
Pitfall 2 - line breaks
Data cells with line breaks will not be removed in the exported CSV file, hence potentially breaking the import. See the example below, where the line break in the address field gives a potential erroneous CSV file. Fix this manually or with a script before exporting to CSV again.
CustomerID,name,address
999662,Ward and Sons,"328 Swaniawski Hills, Port Alview,
IN 88649"
998406,Feil and Sons,"96 Rosalee Ford Suite 495,
Hagenesburgh, OH 24769-1364"
2. Import data
We are now ready to import our 3 spreadsheet files:
- Customers.csv
- Products.csv
- Sales.csv
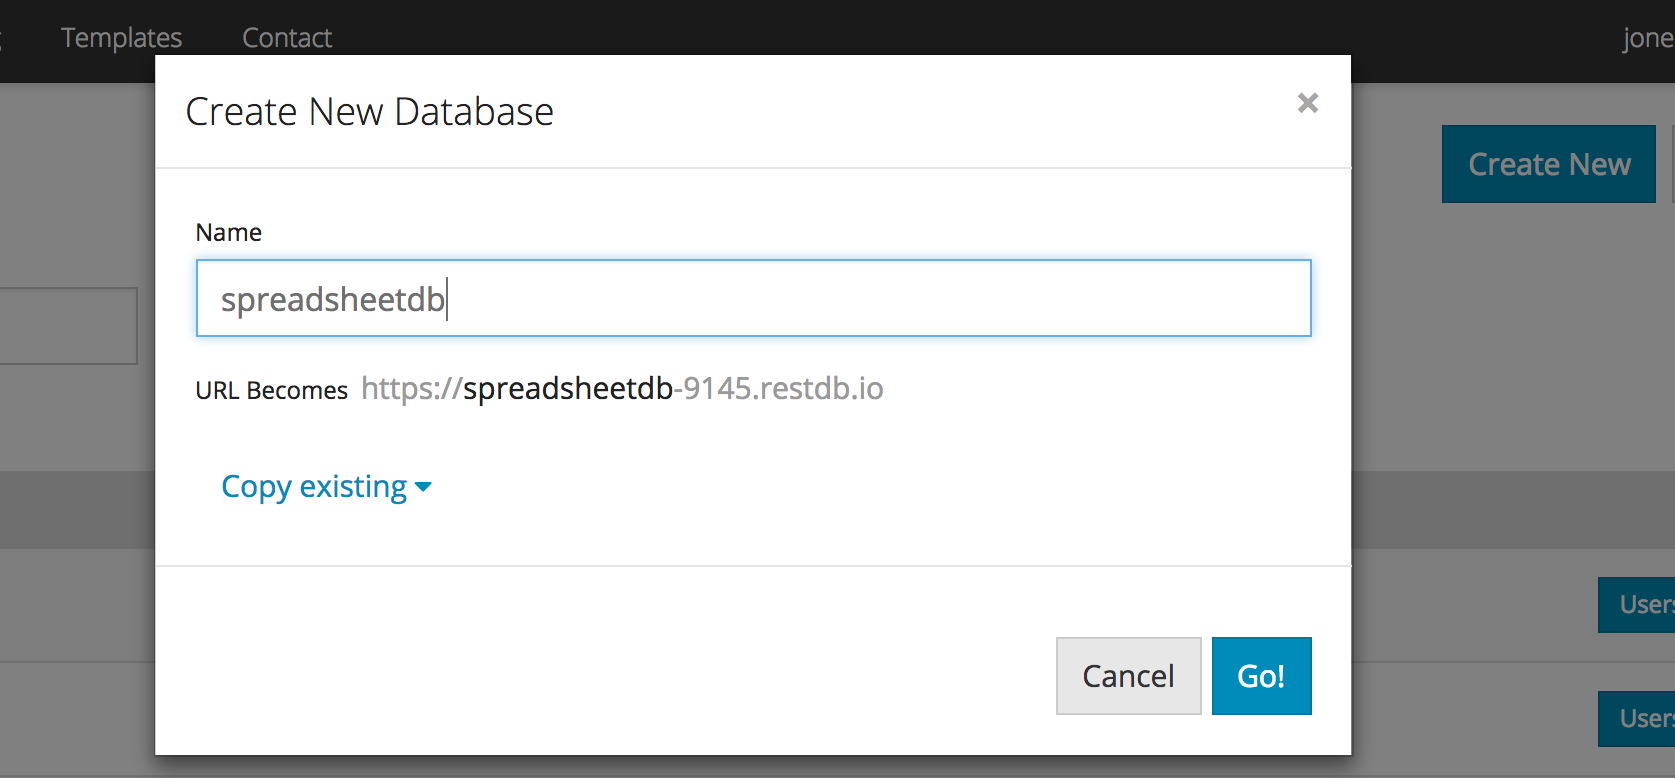
Lets create a new database first. Click the "Create New" button and give the database a unique name, e.g. spreadsheetdb.
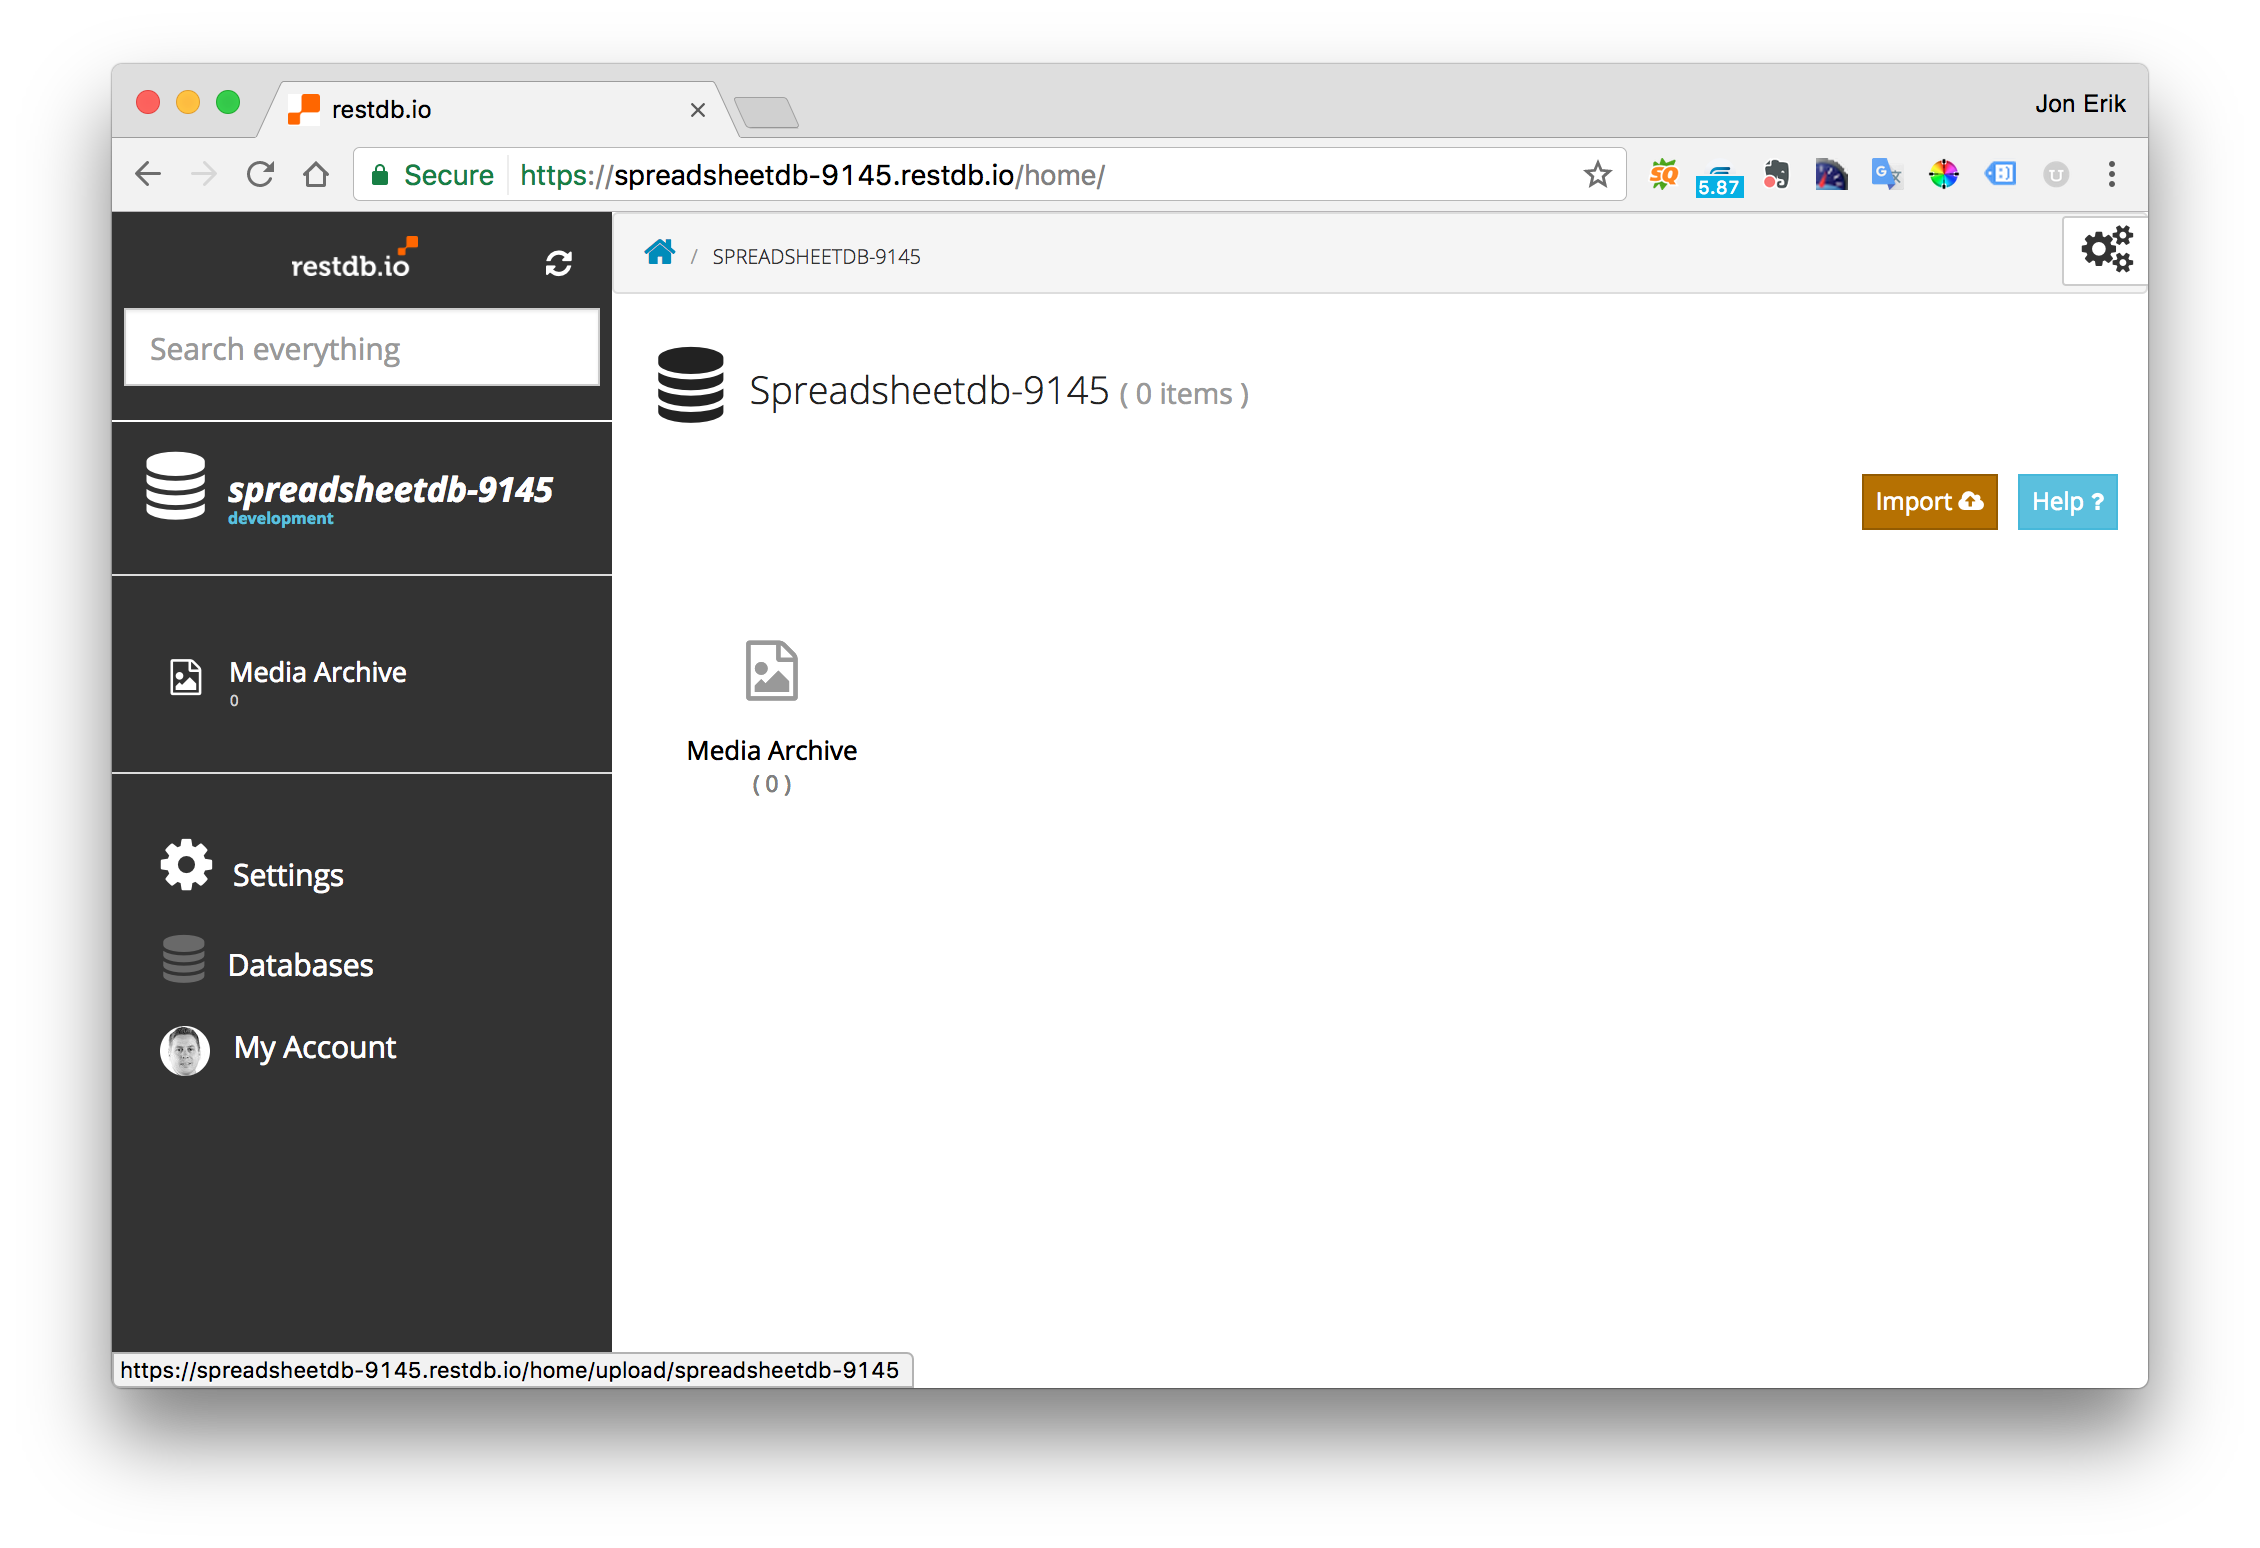
Our new empty database now has the following URL endpoint:
[https://spreadsheetdb-9145.restdb.io](https://spreadsheetdb-9145.restdb.io/)
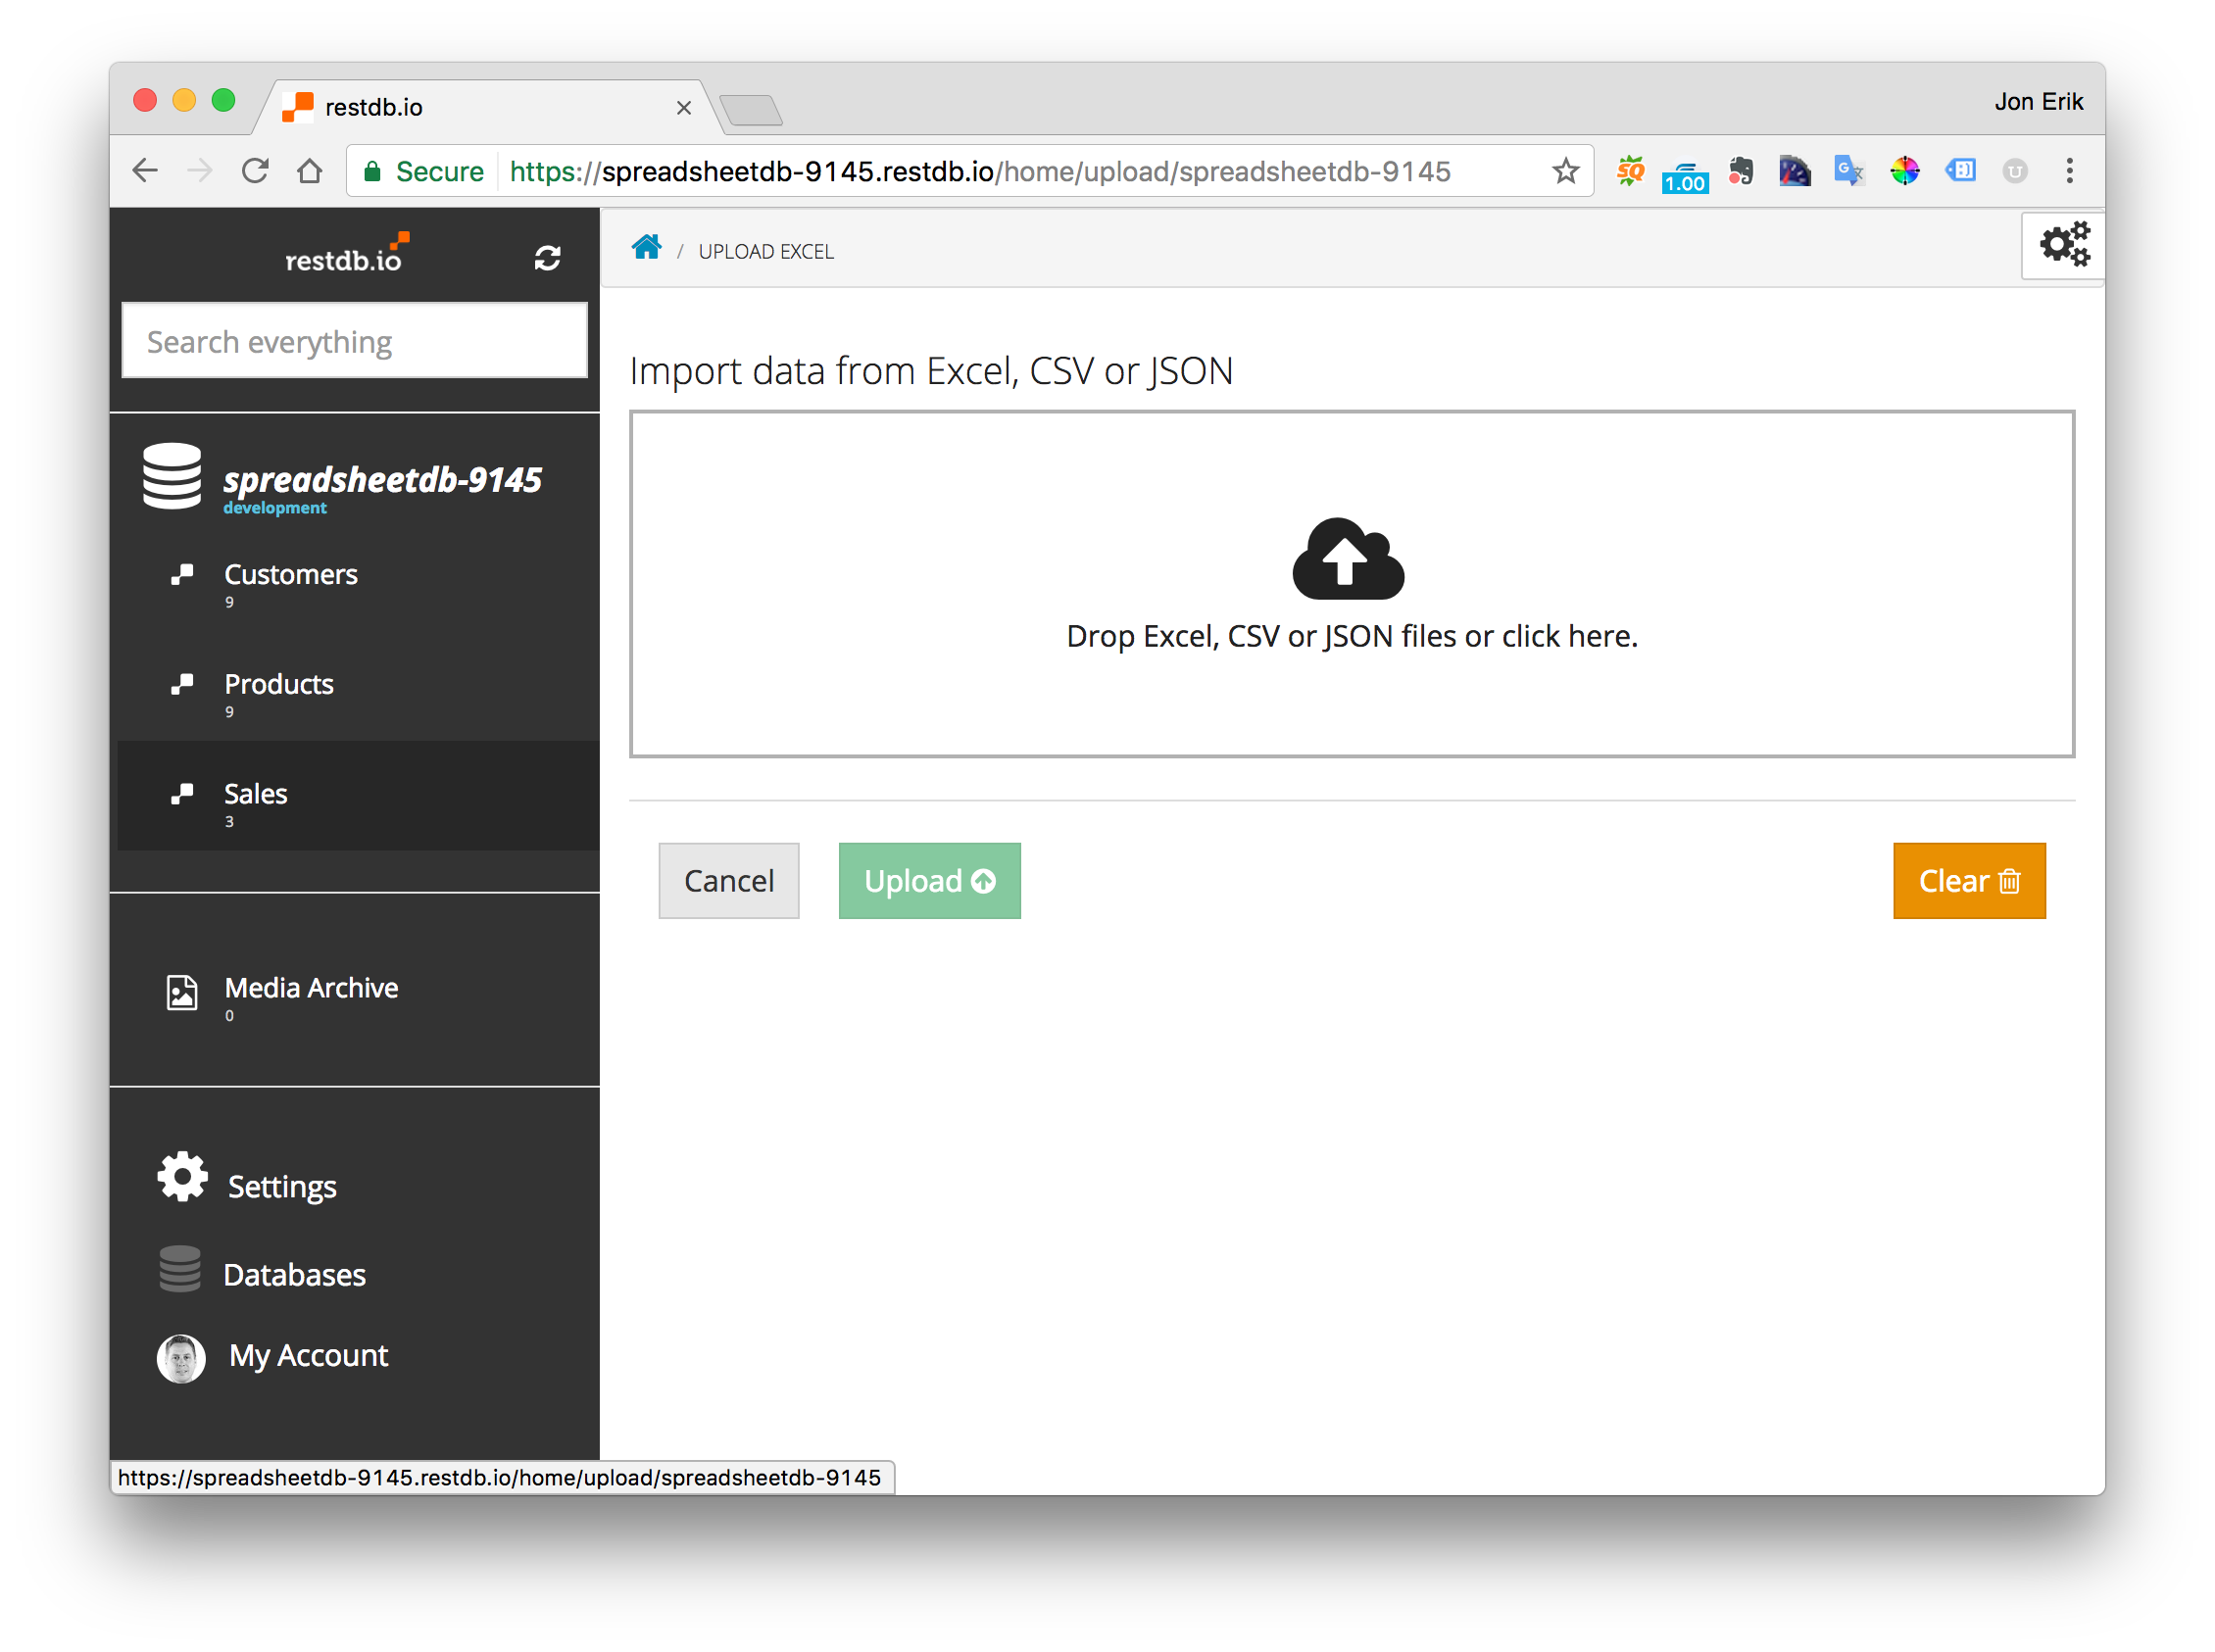
We can now start to import our data files. Click on the "Import" button.
Upload the first file by dragging or clicking on the big upload area.
For each file you must specify a unique collection name and column names and data types. E.g. for the Customer file, we change the second column name from name to capitalized Name. We also get a handy preview of some data rows before starting the import.
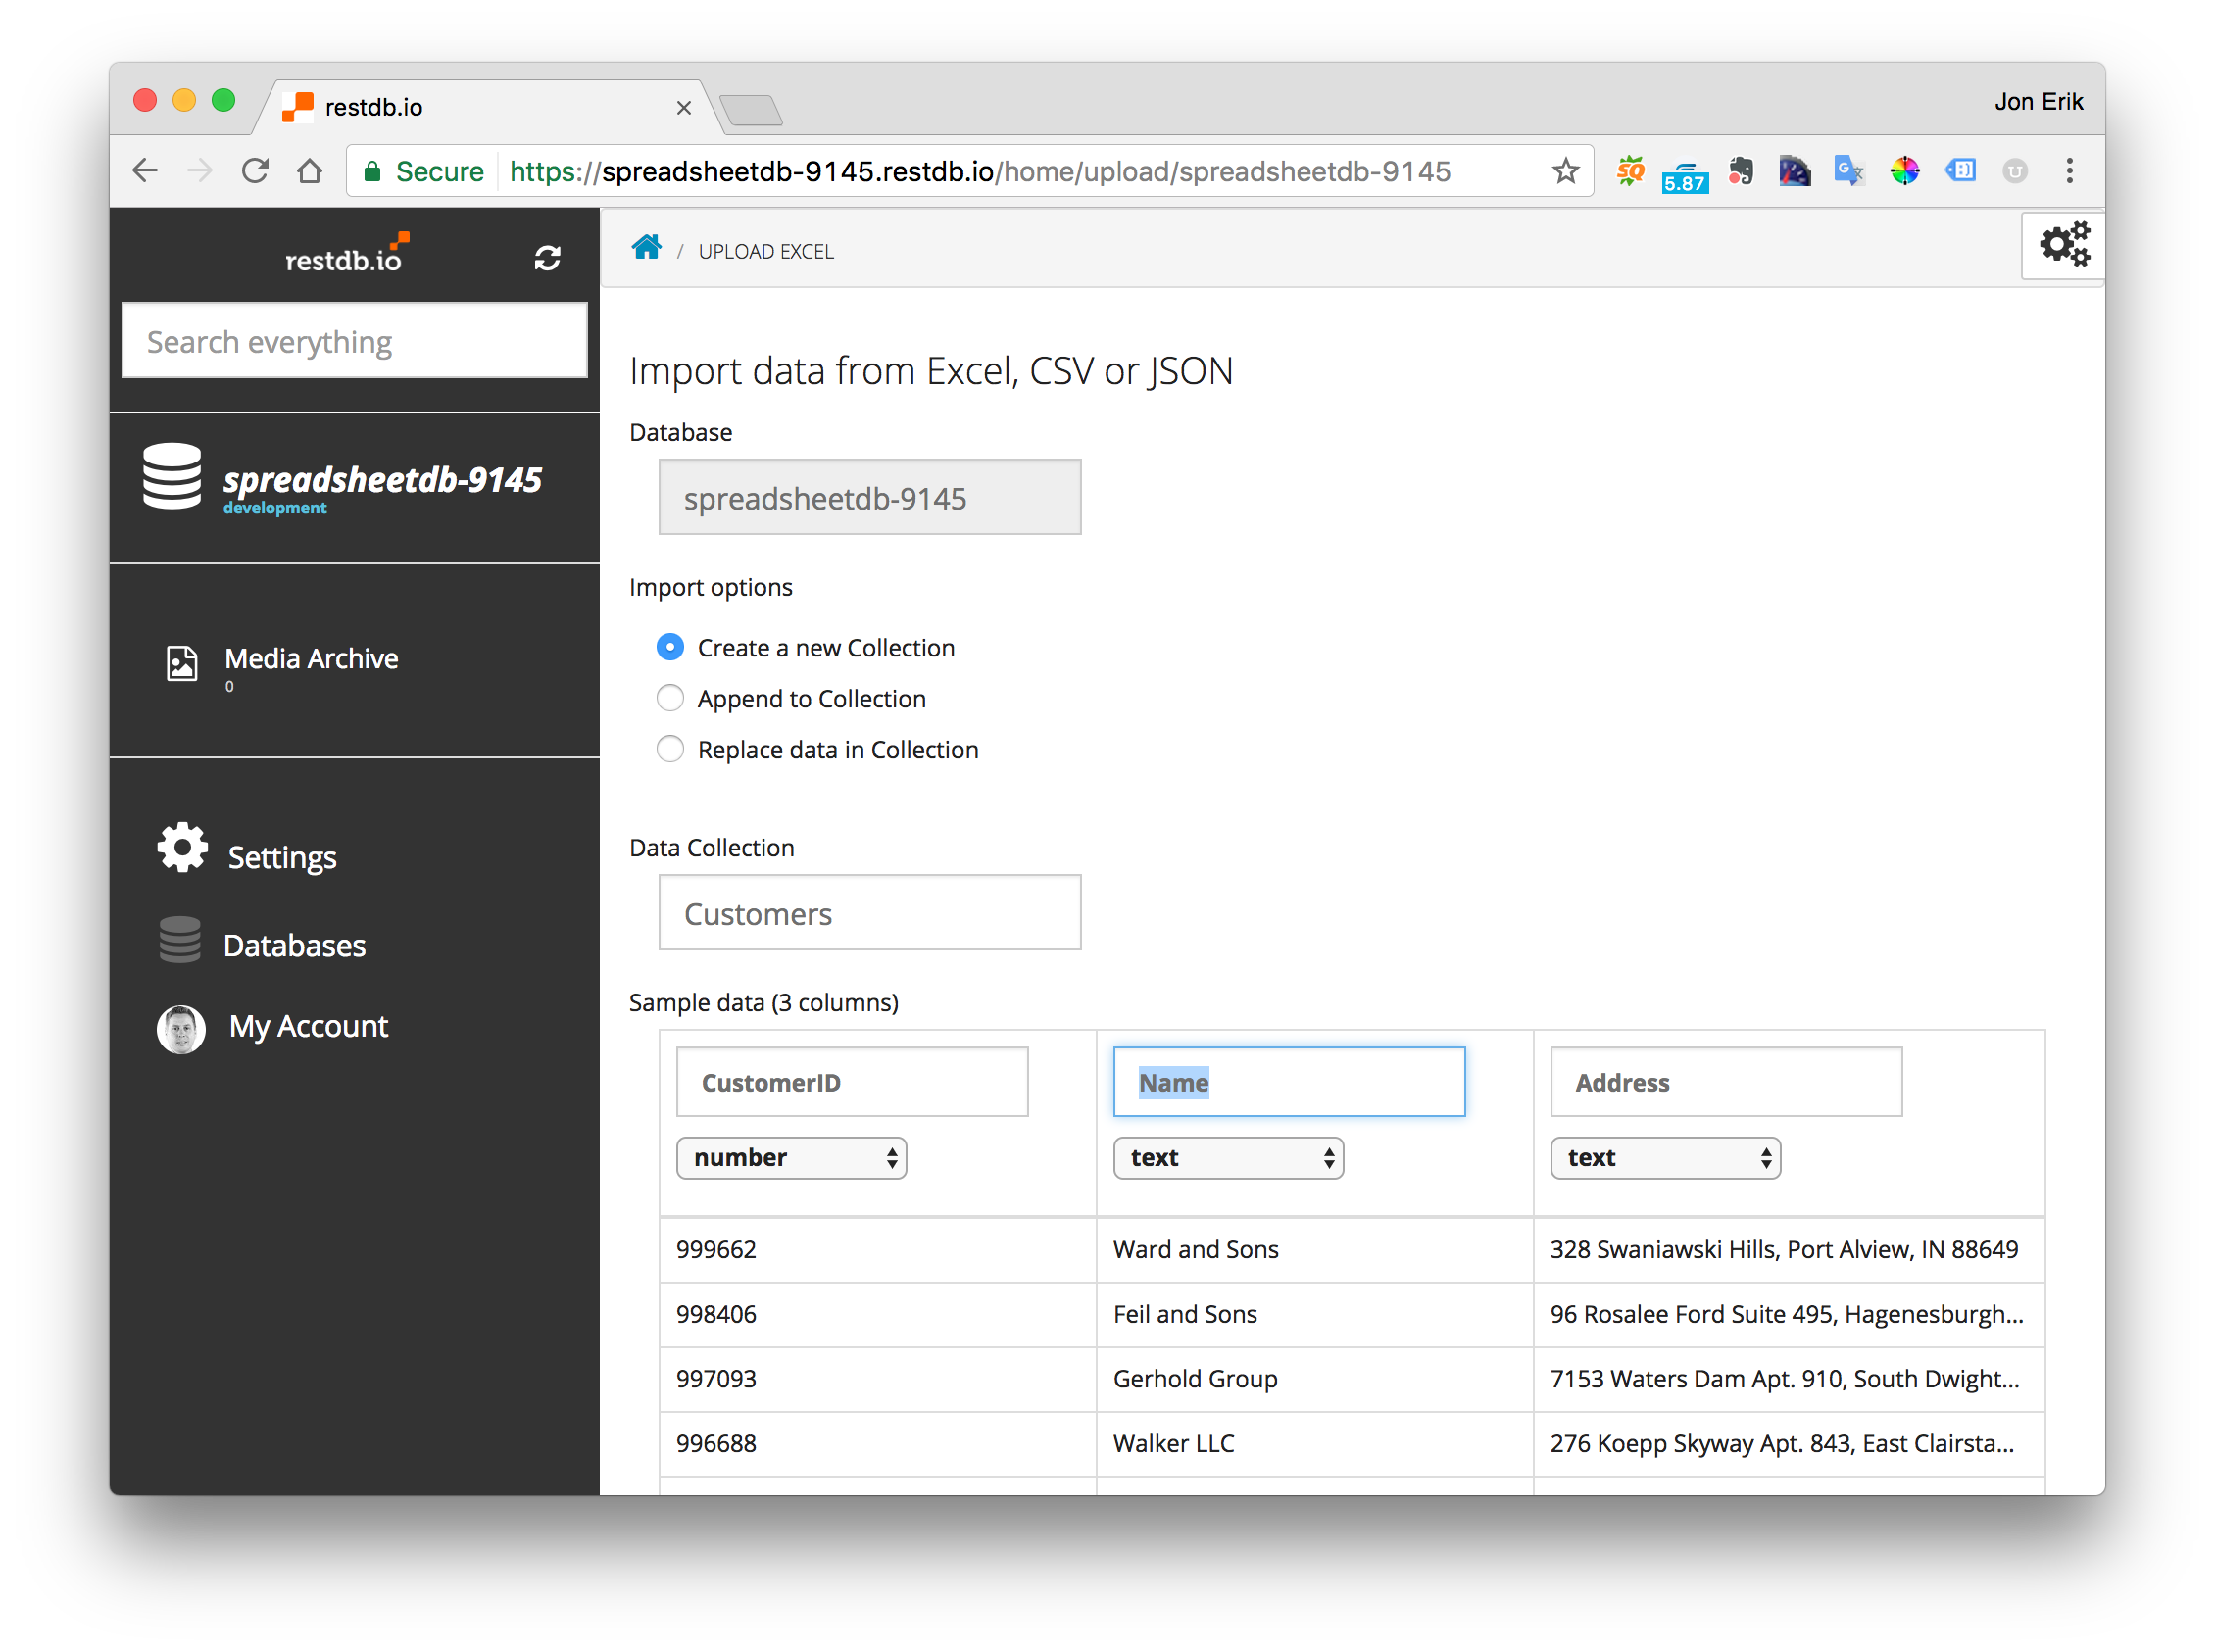
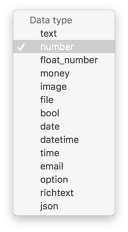
Note that we can also specify the data type for each column by clicking on the dropdown list under each column name.
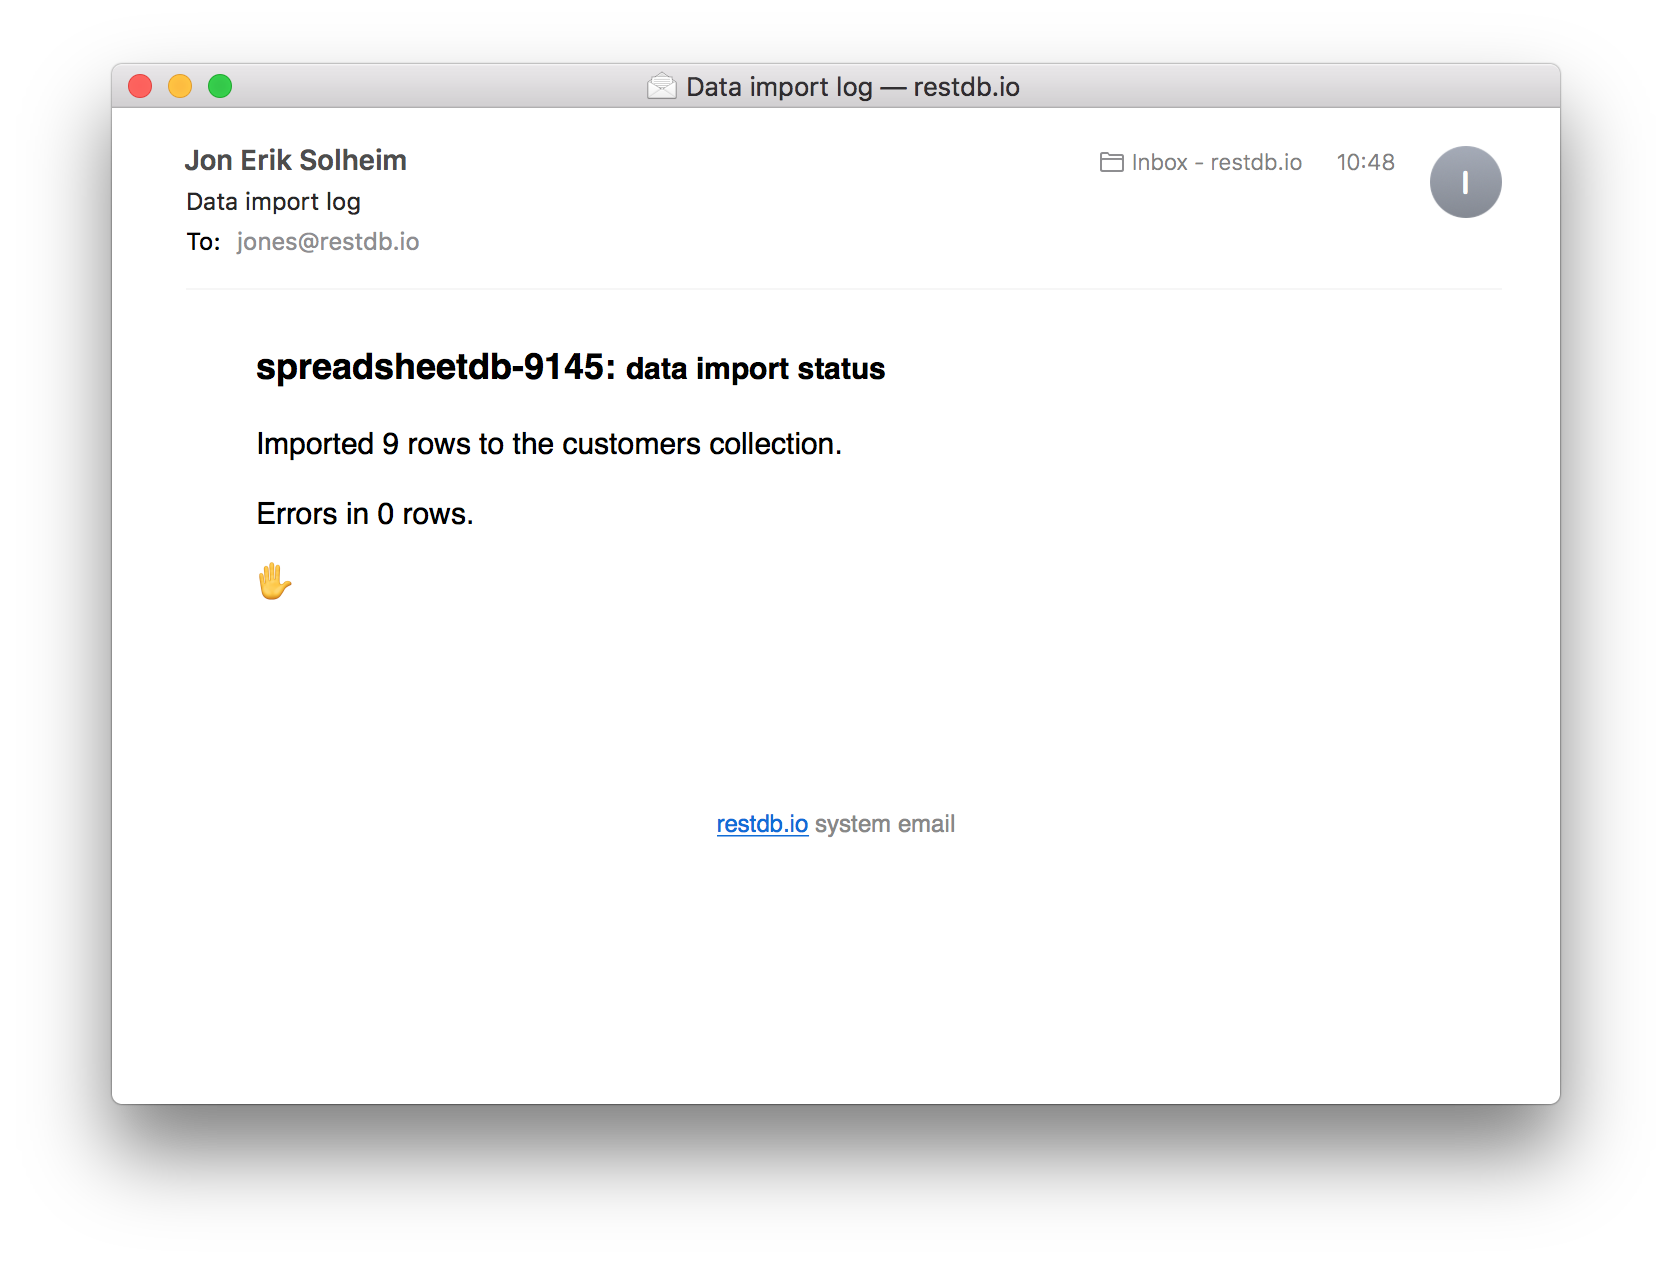
Importing data to our database runs as a background job, and for large files this can take some time. Therefore you will receive an email with a report after each data import is completed. In this case we only imported a small dataset and all data was imported without errors.
After doing the same operation on all 3 files we have our first version of the database ready. We have all our data from the spreadsheet, and inspecting the Products collection shows that the data import was a success.
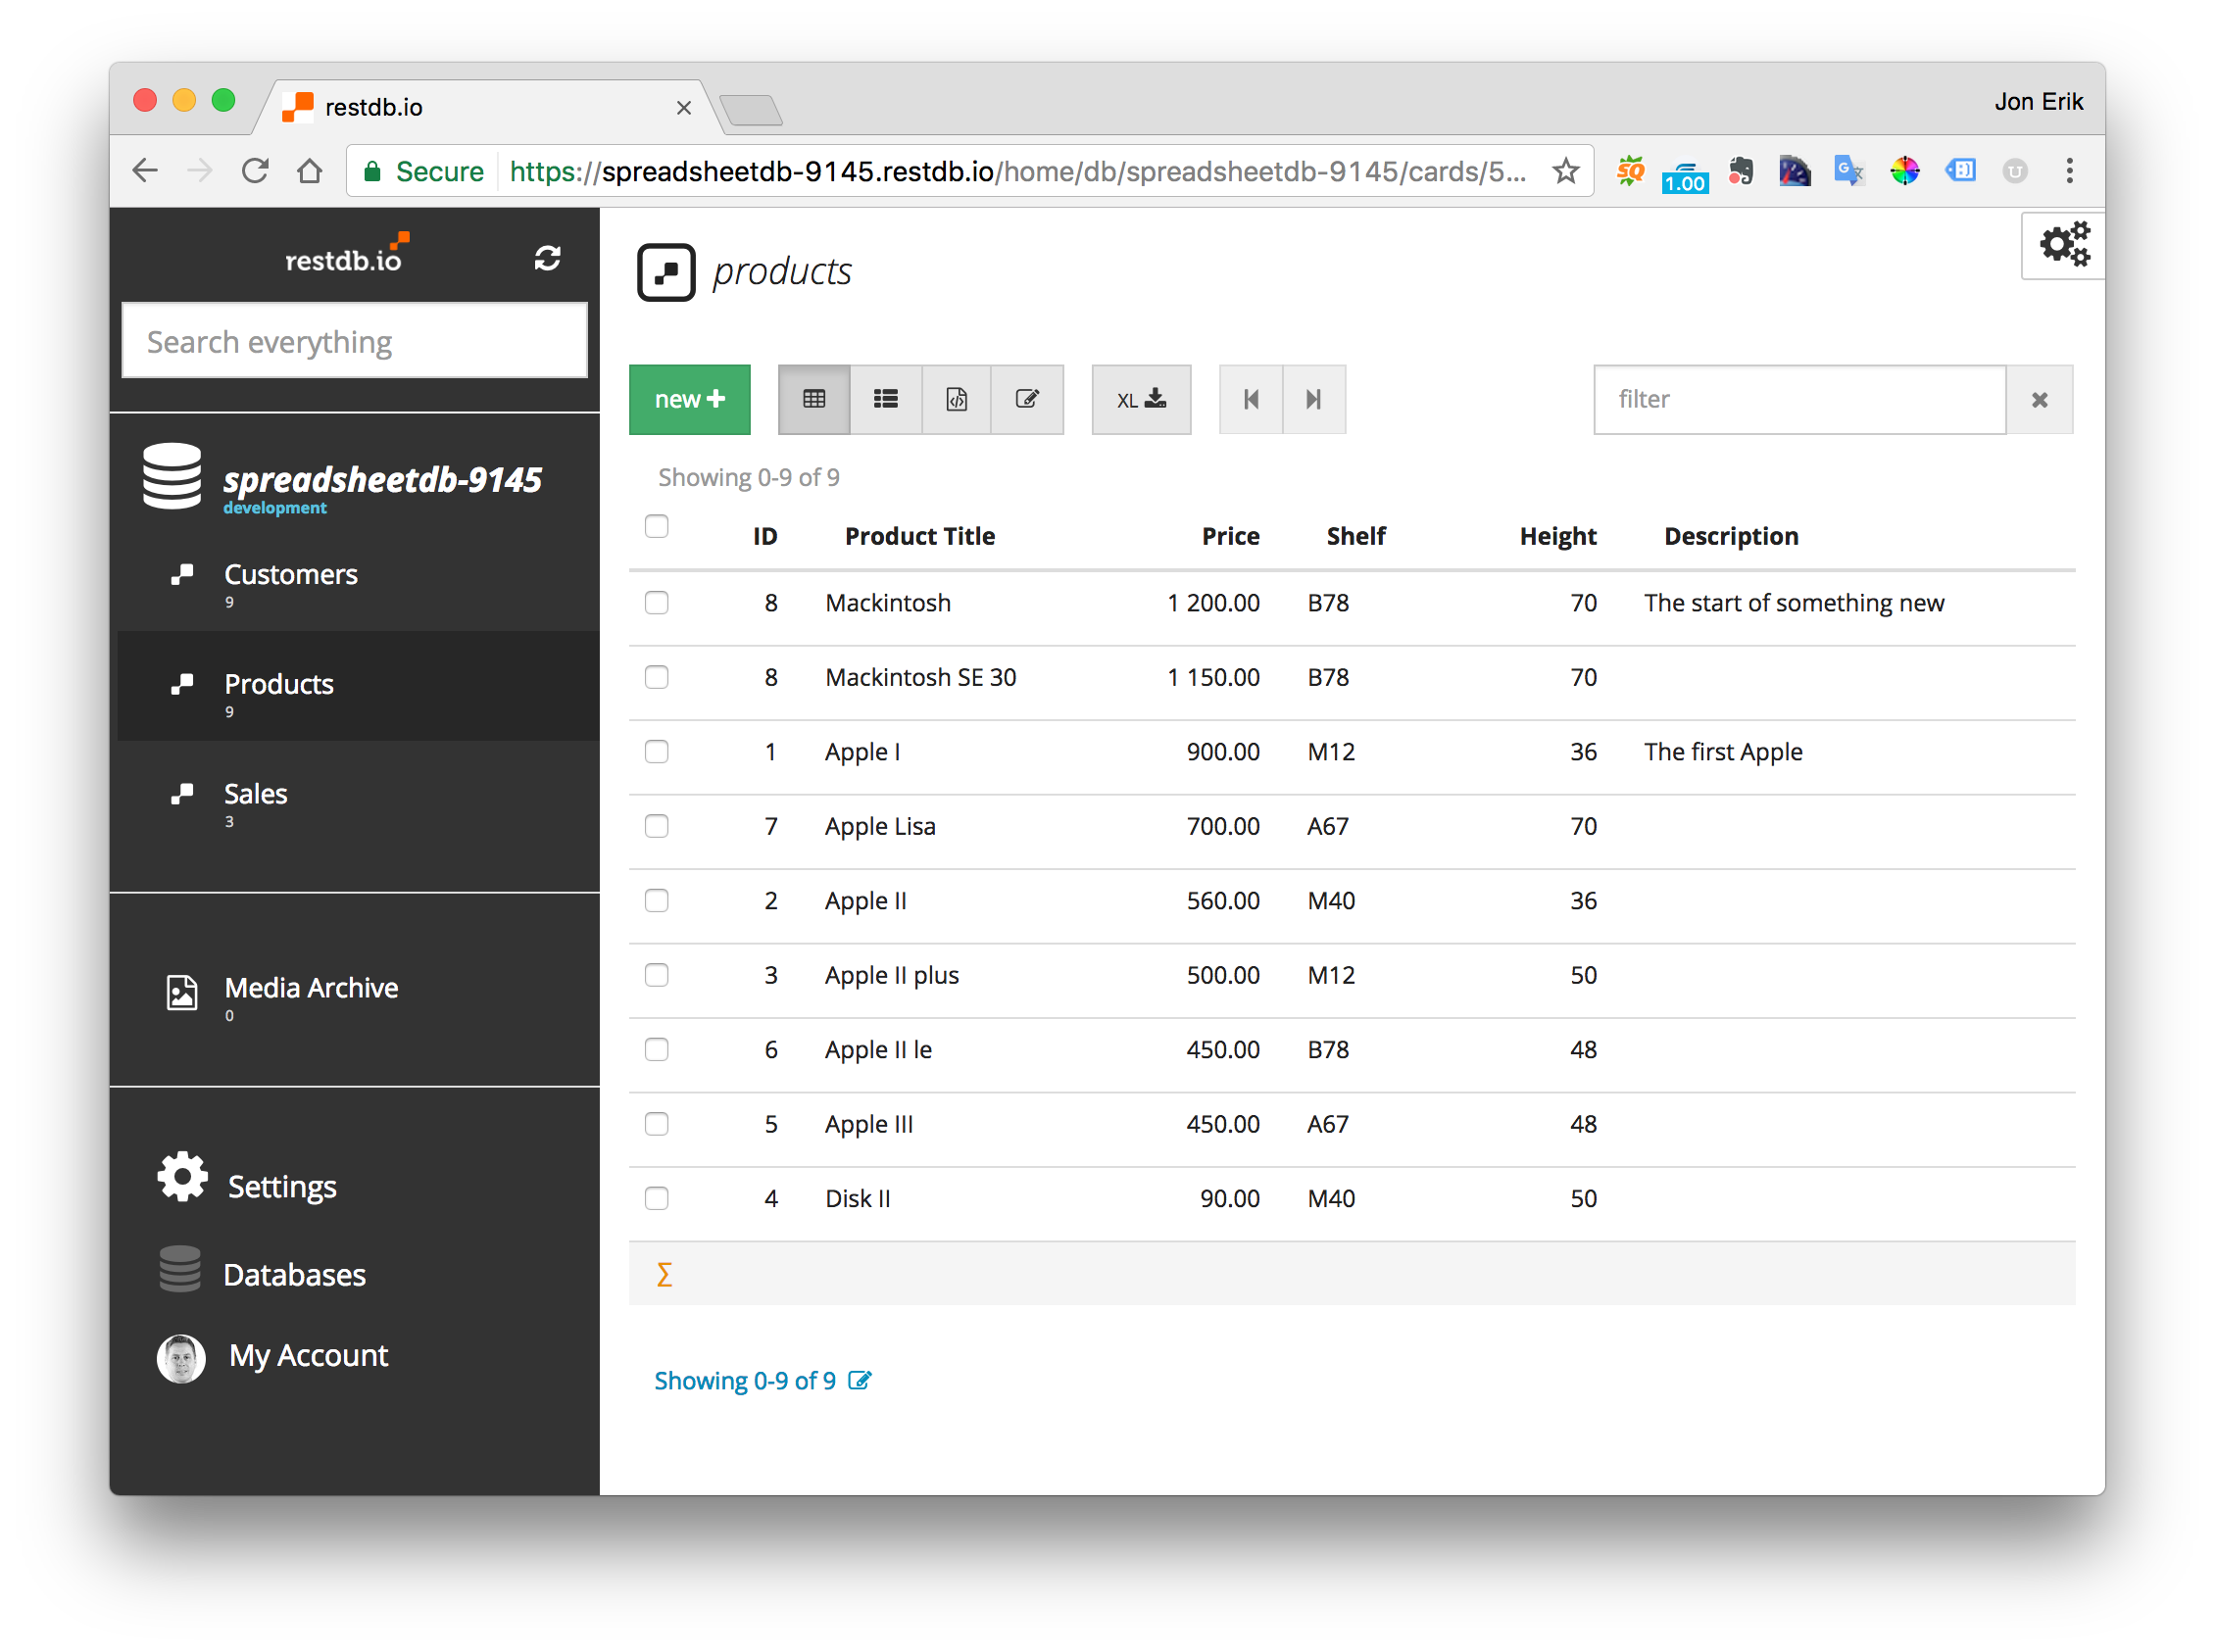
We're all set to start mapping relations and some logic.
3. Map data relations and formula/logic
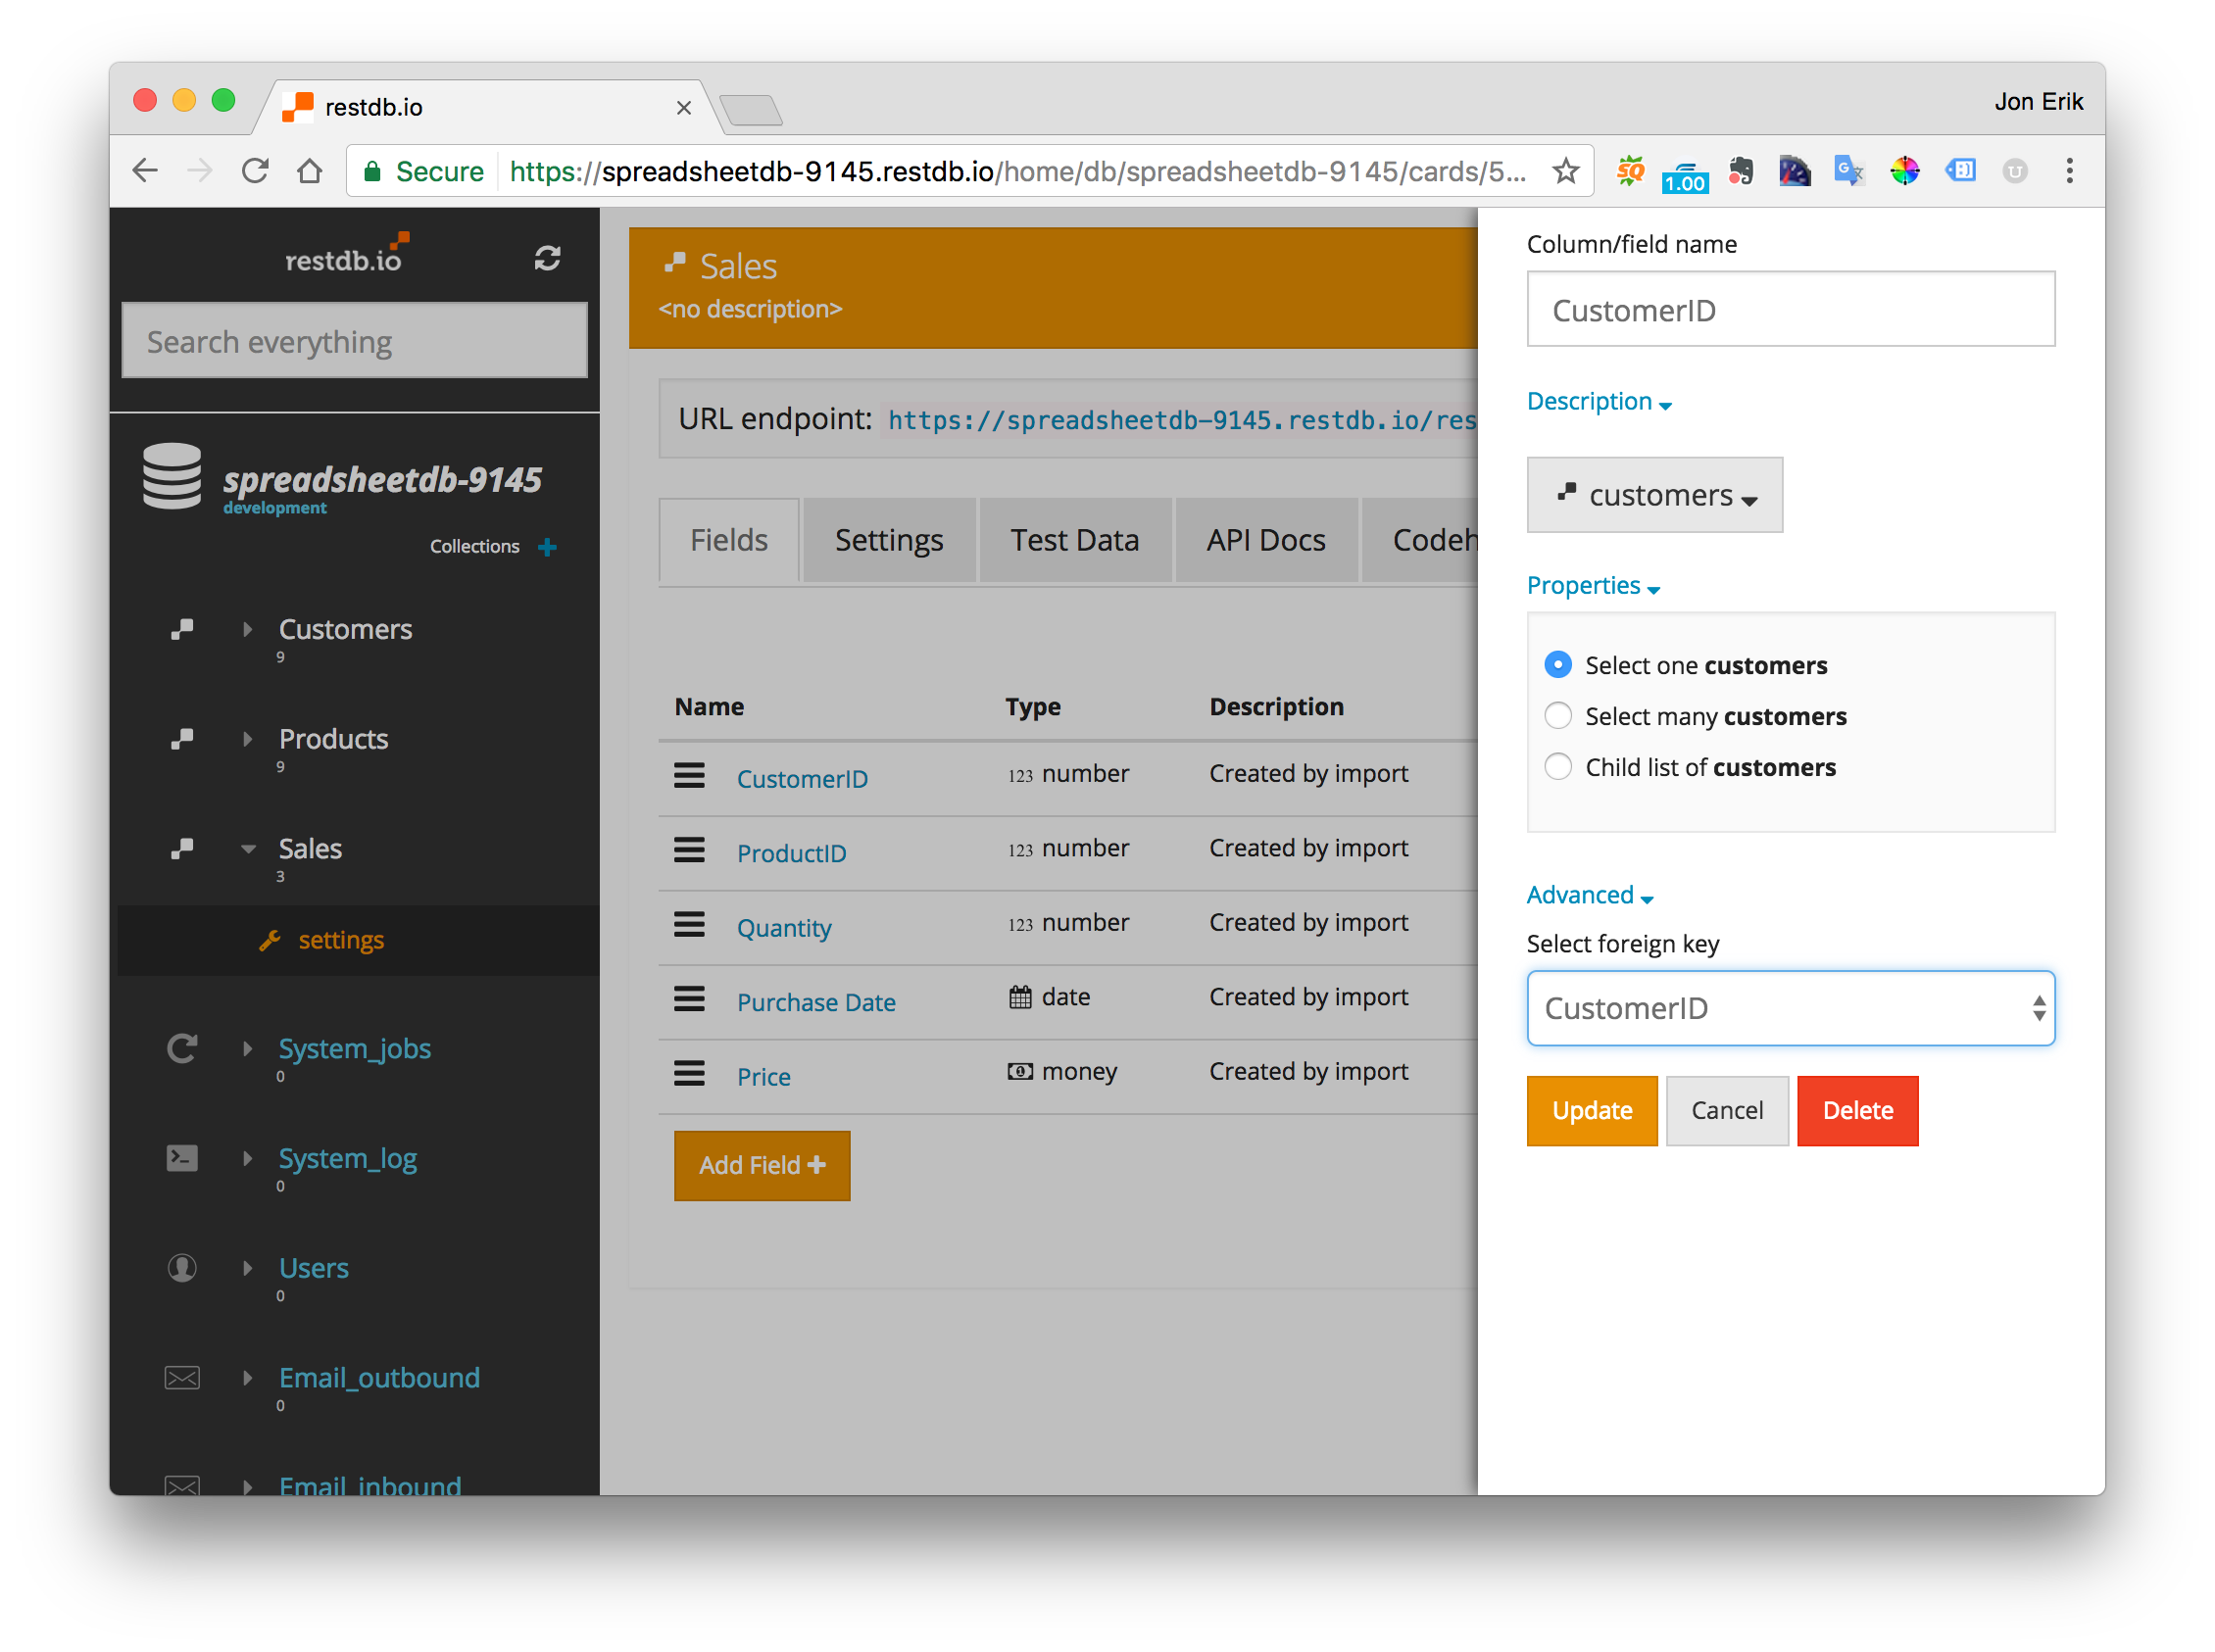
Lets change the ID fields in the Sales collection from numbers to actual objects instead. In Development-mode we navigate to the settings of Sales. We can see that the CustomerID and ProductIDhave a data type of number. We click on the CustomerID field and change the data type to customersand specify "Select one customers". Important: select the advanced option and choose the mapping column from the target collection.
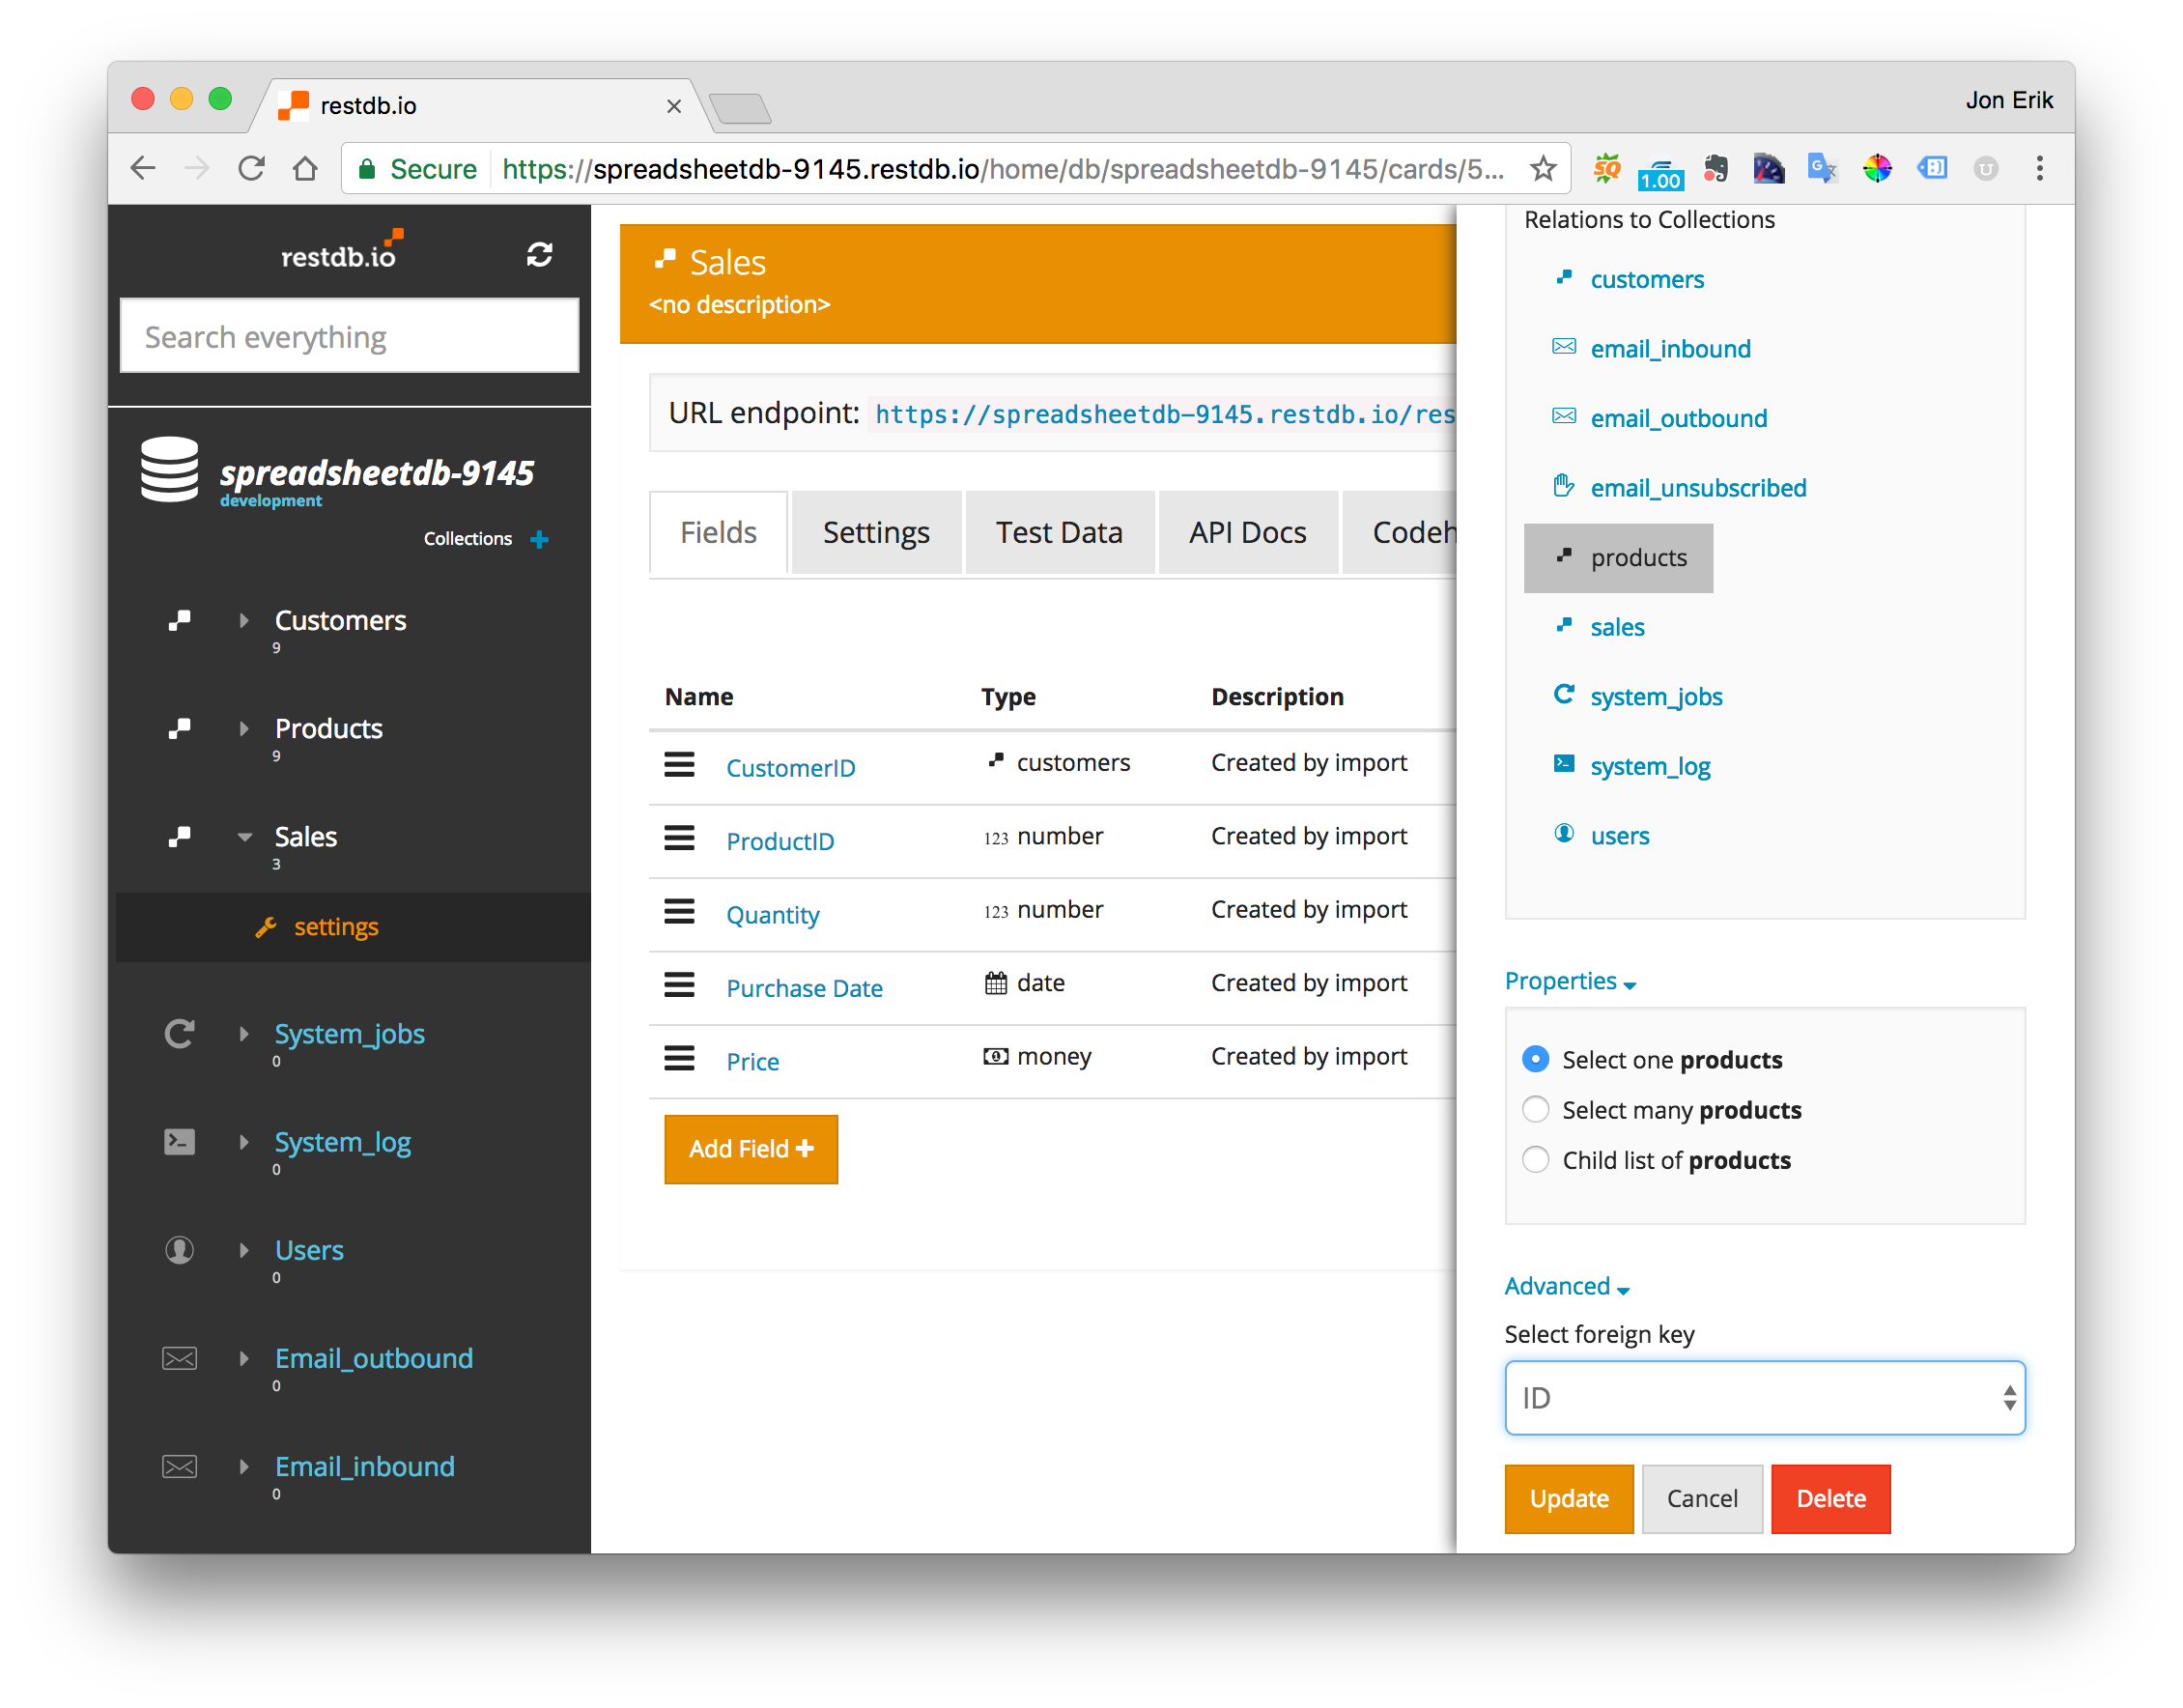
We repeat the operation for the ProductID field also, the only difference is that we pick the productscollection and the ID column as foreign key.
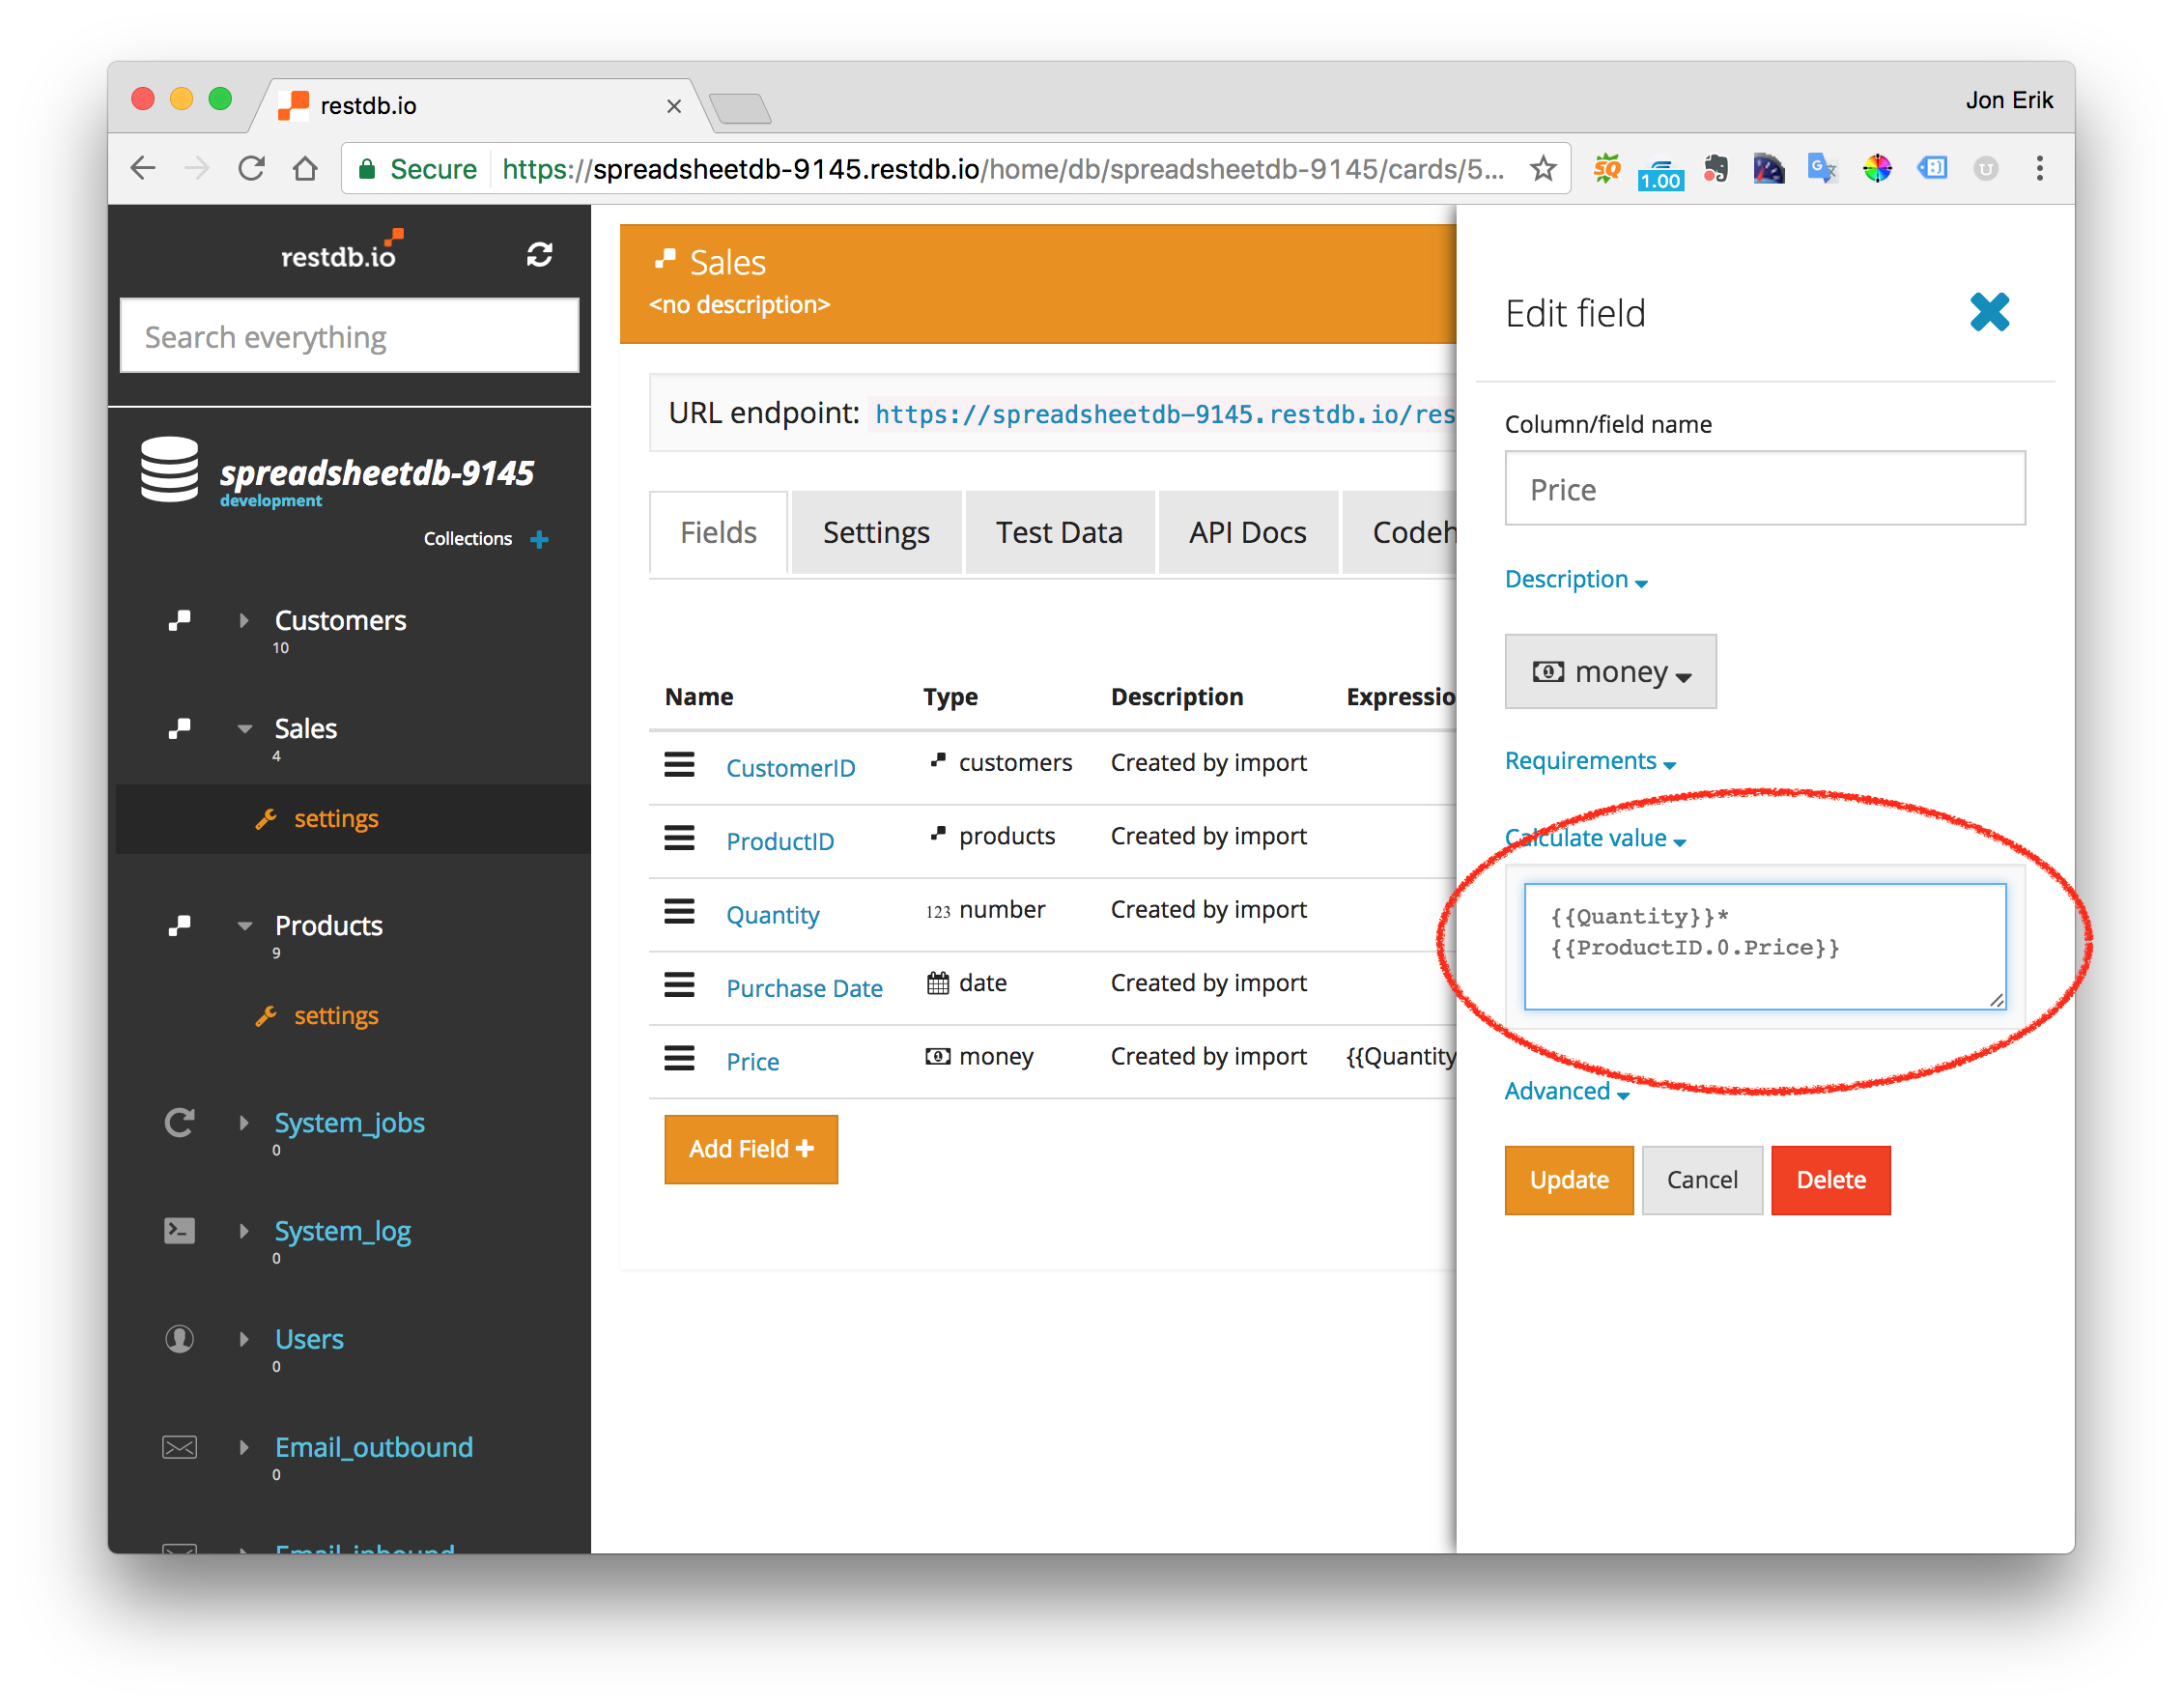
We also want to automate the calculation of sales price. We will add a small formula to the Price field for this. Click on the field and open the Calculate value option. We add a formula to multiply the first (relations are always arrays) product price with the quantity.
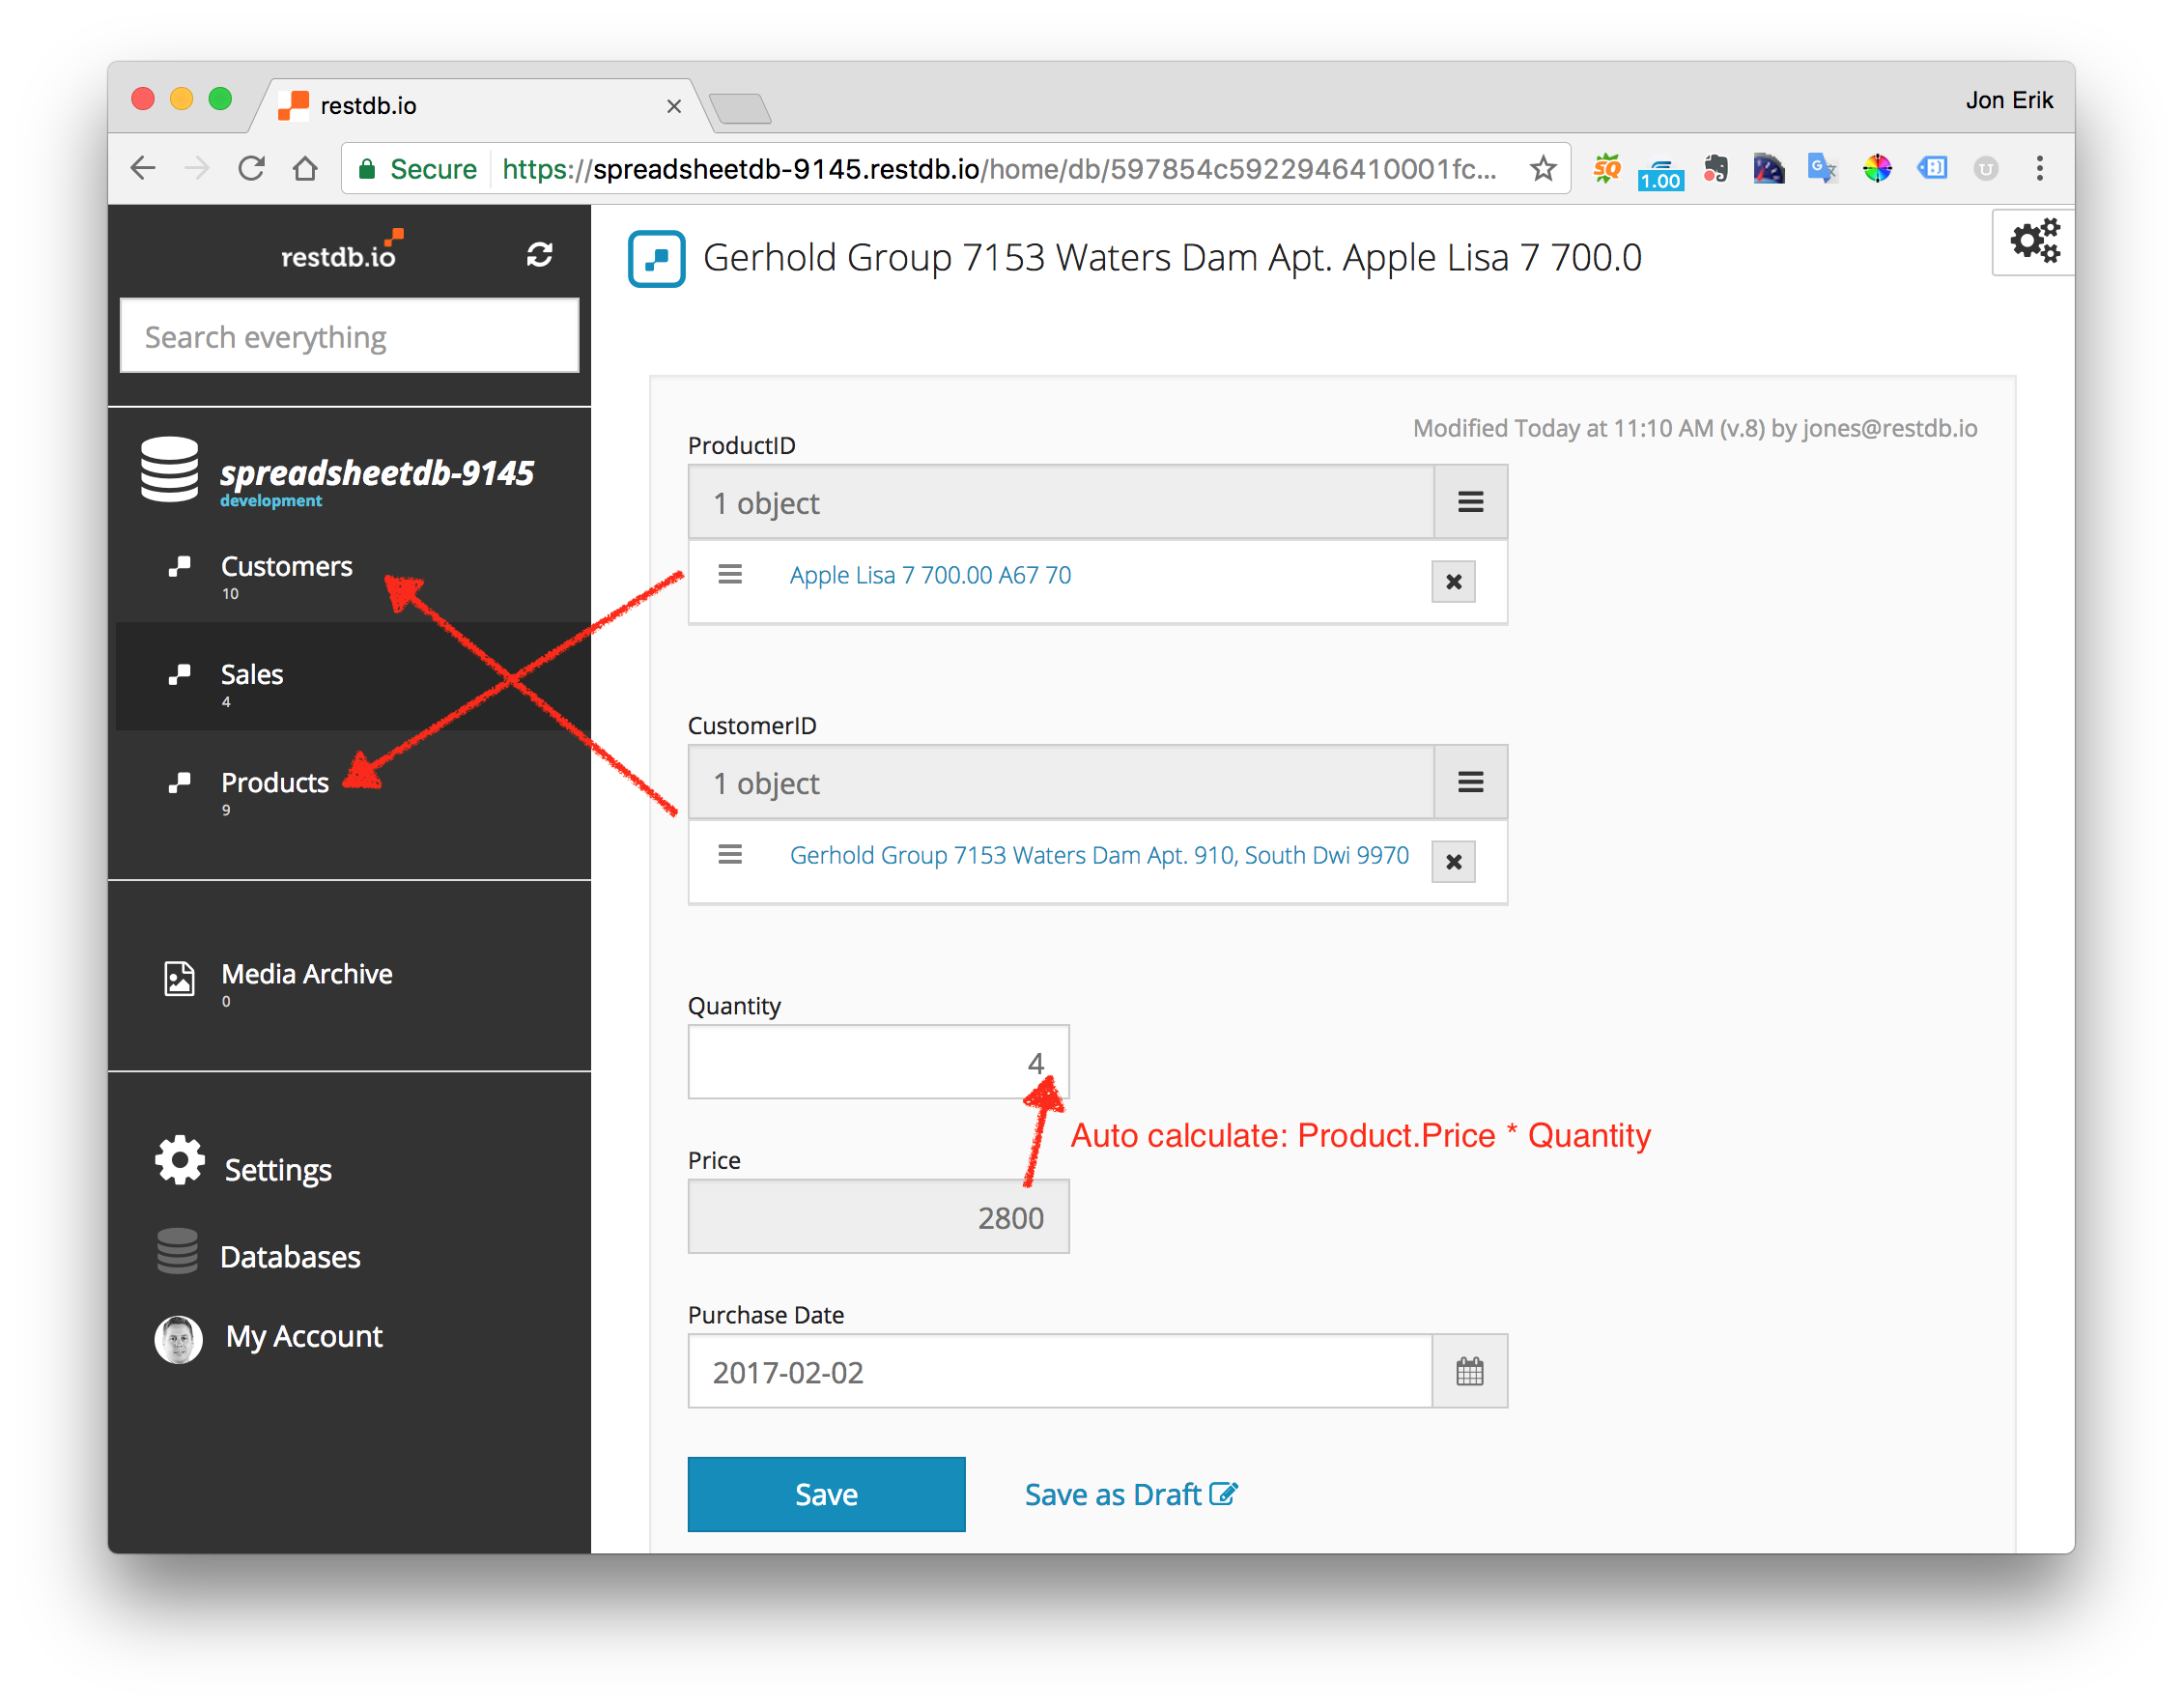
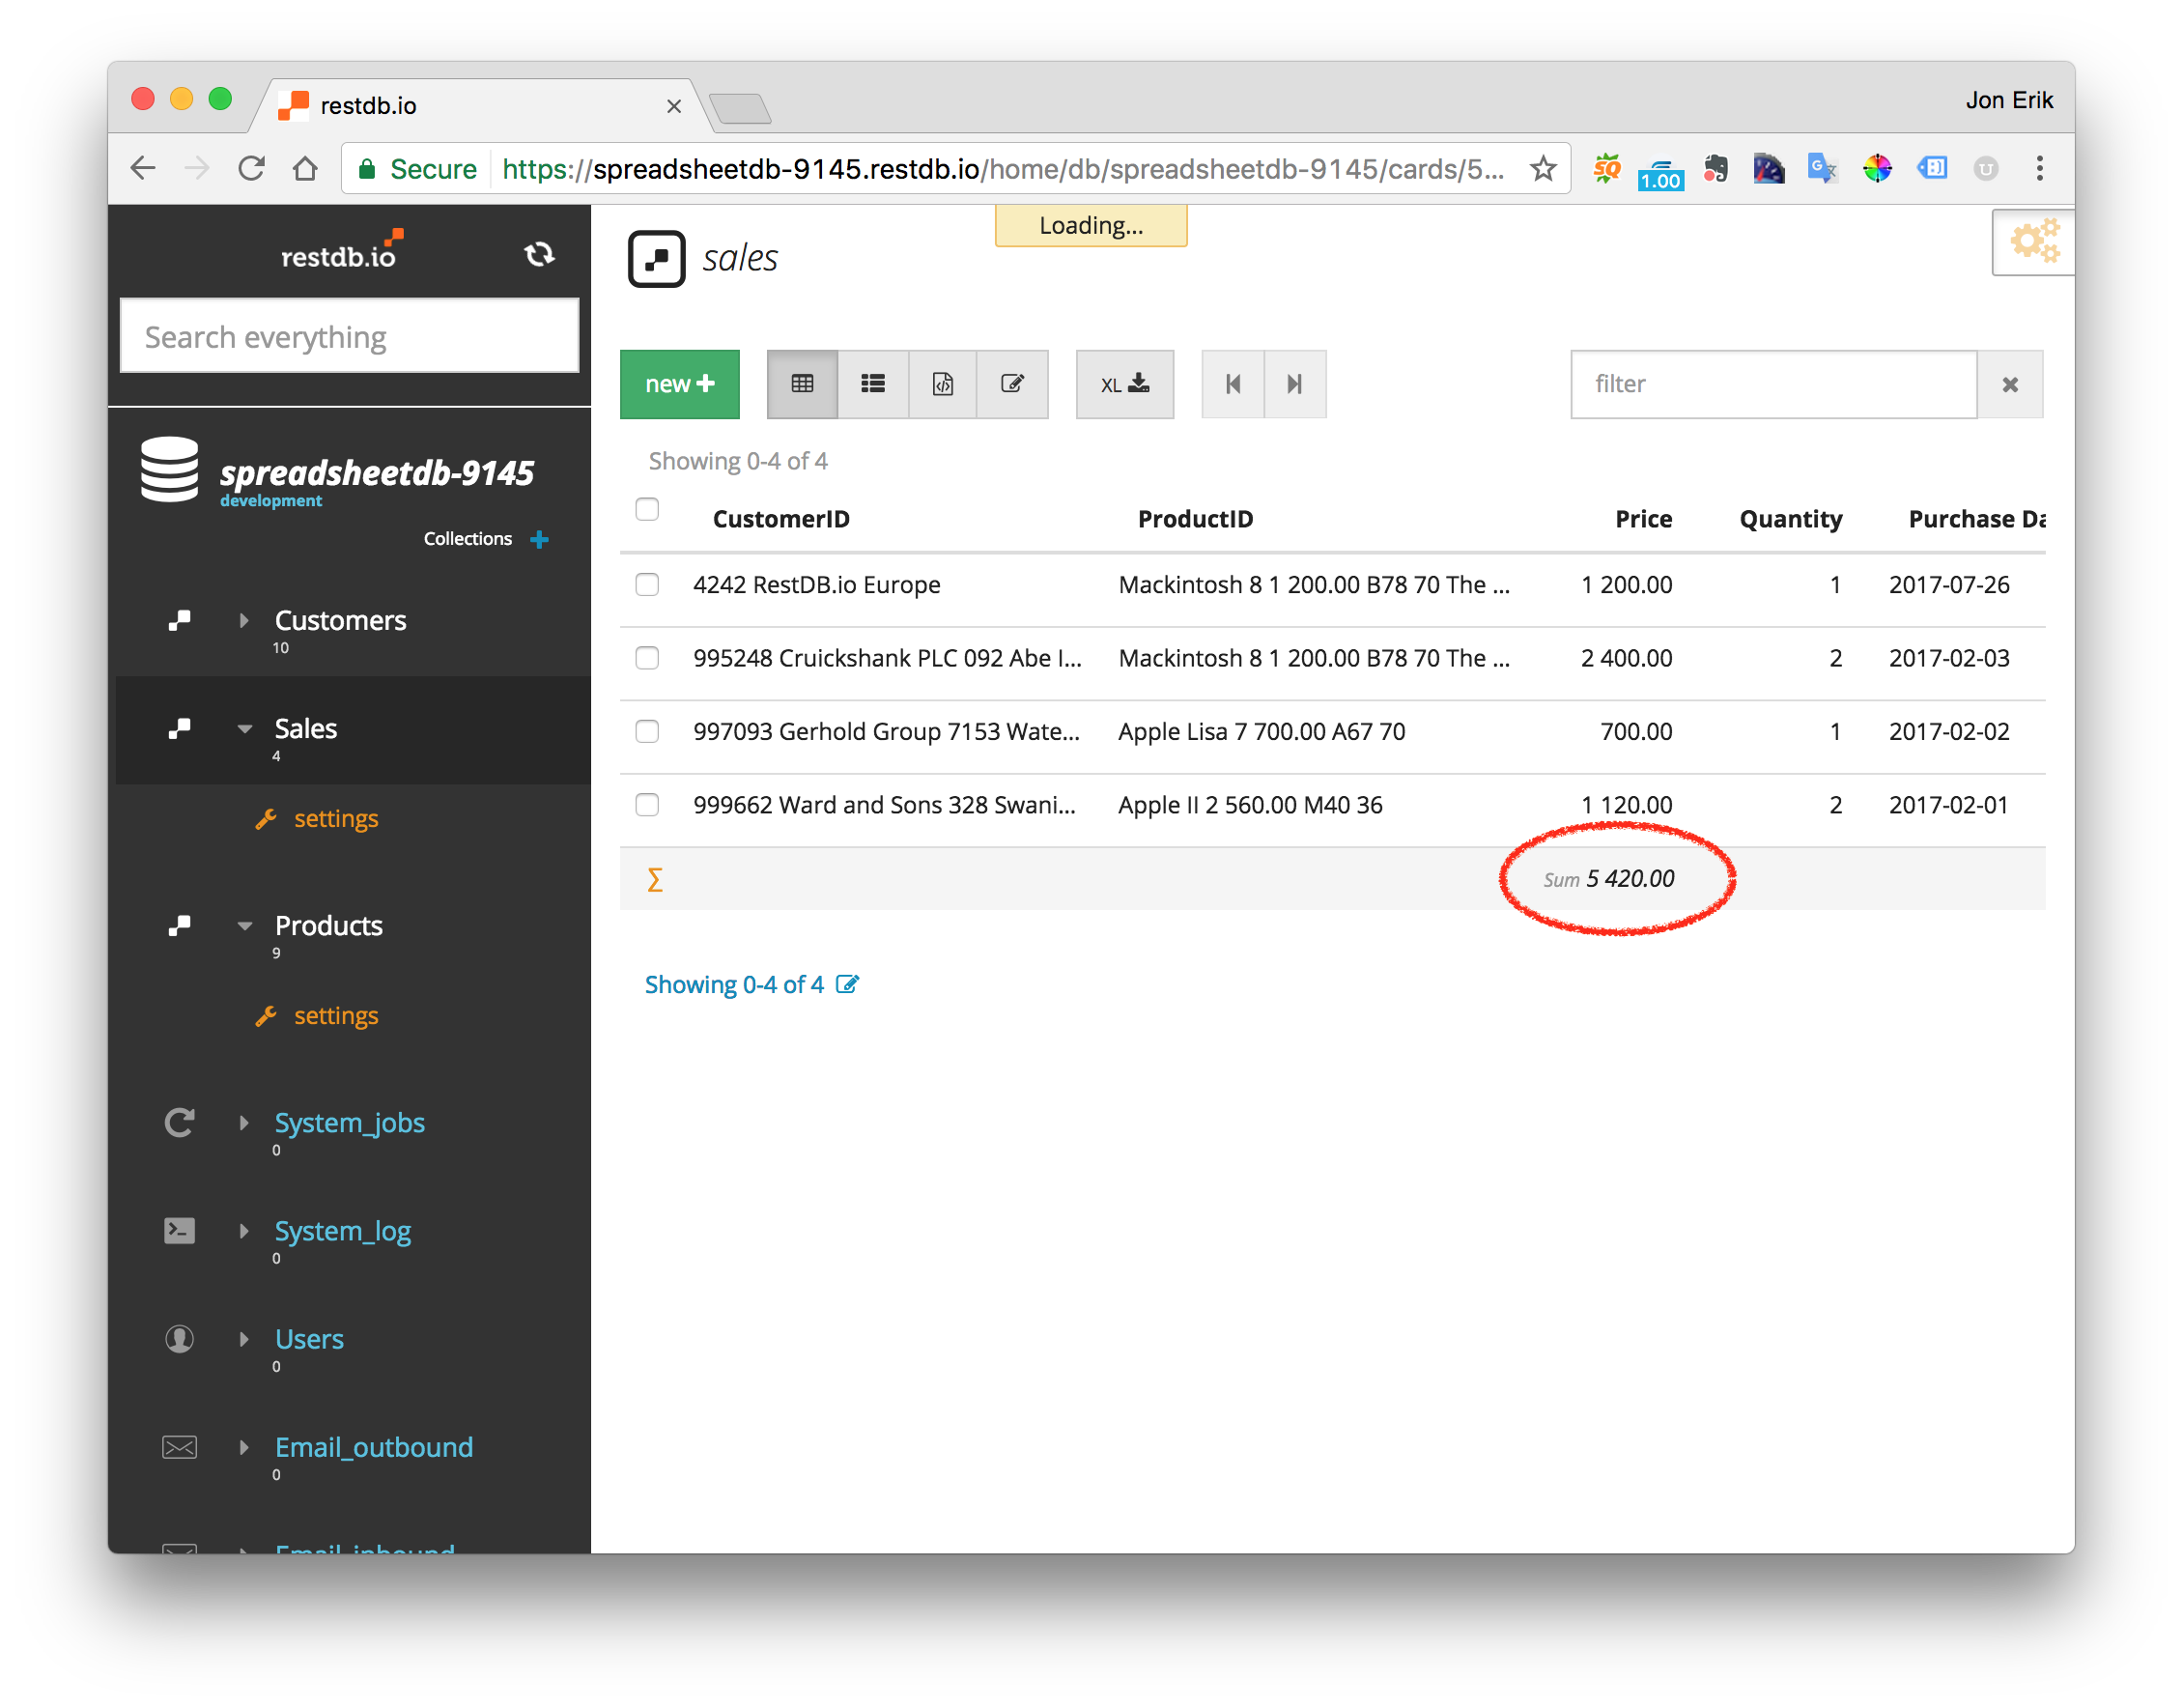
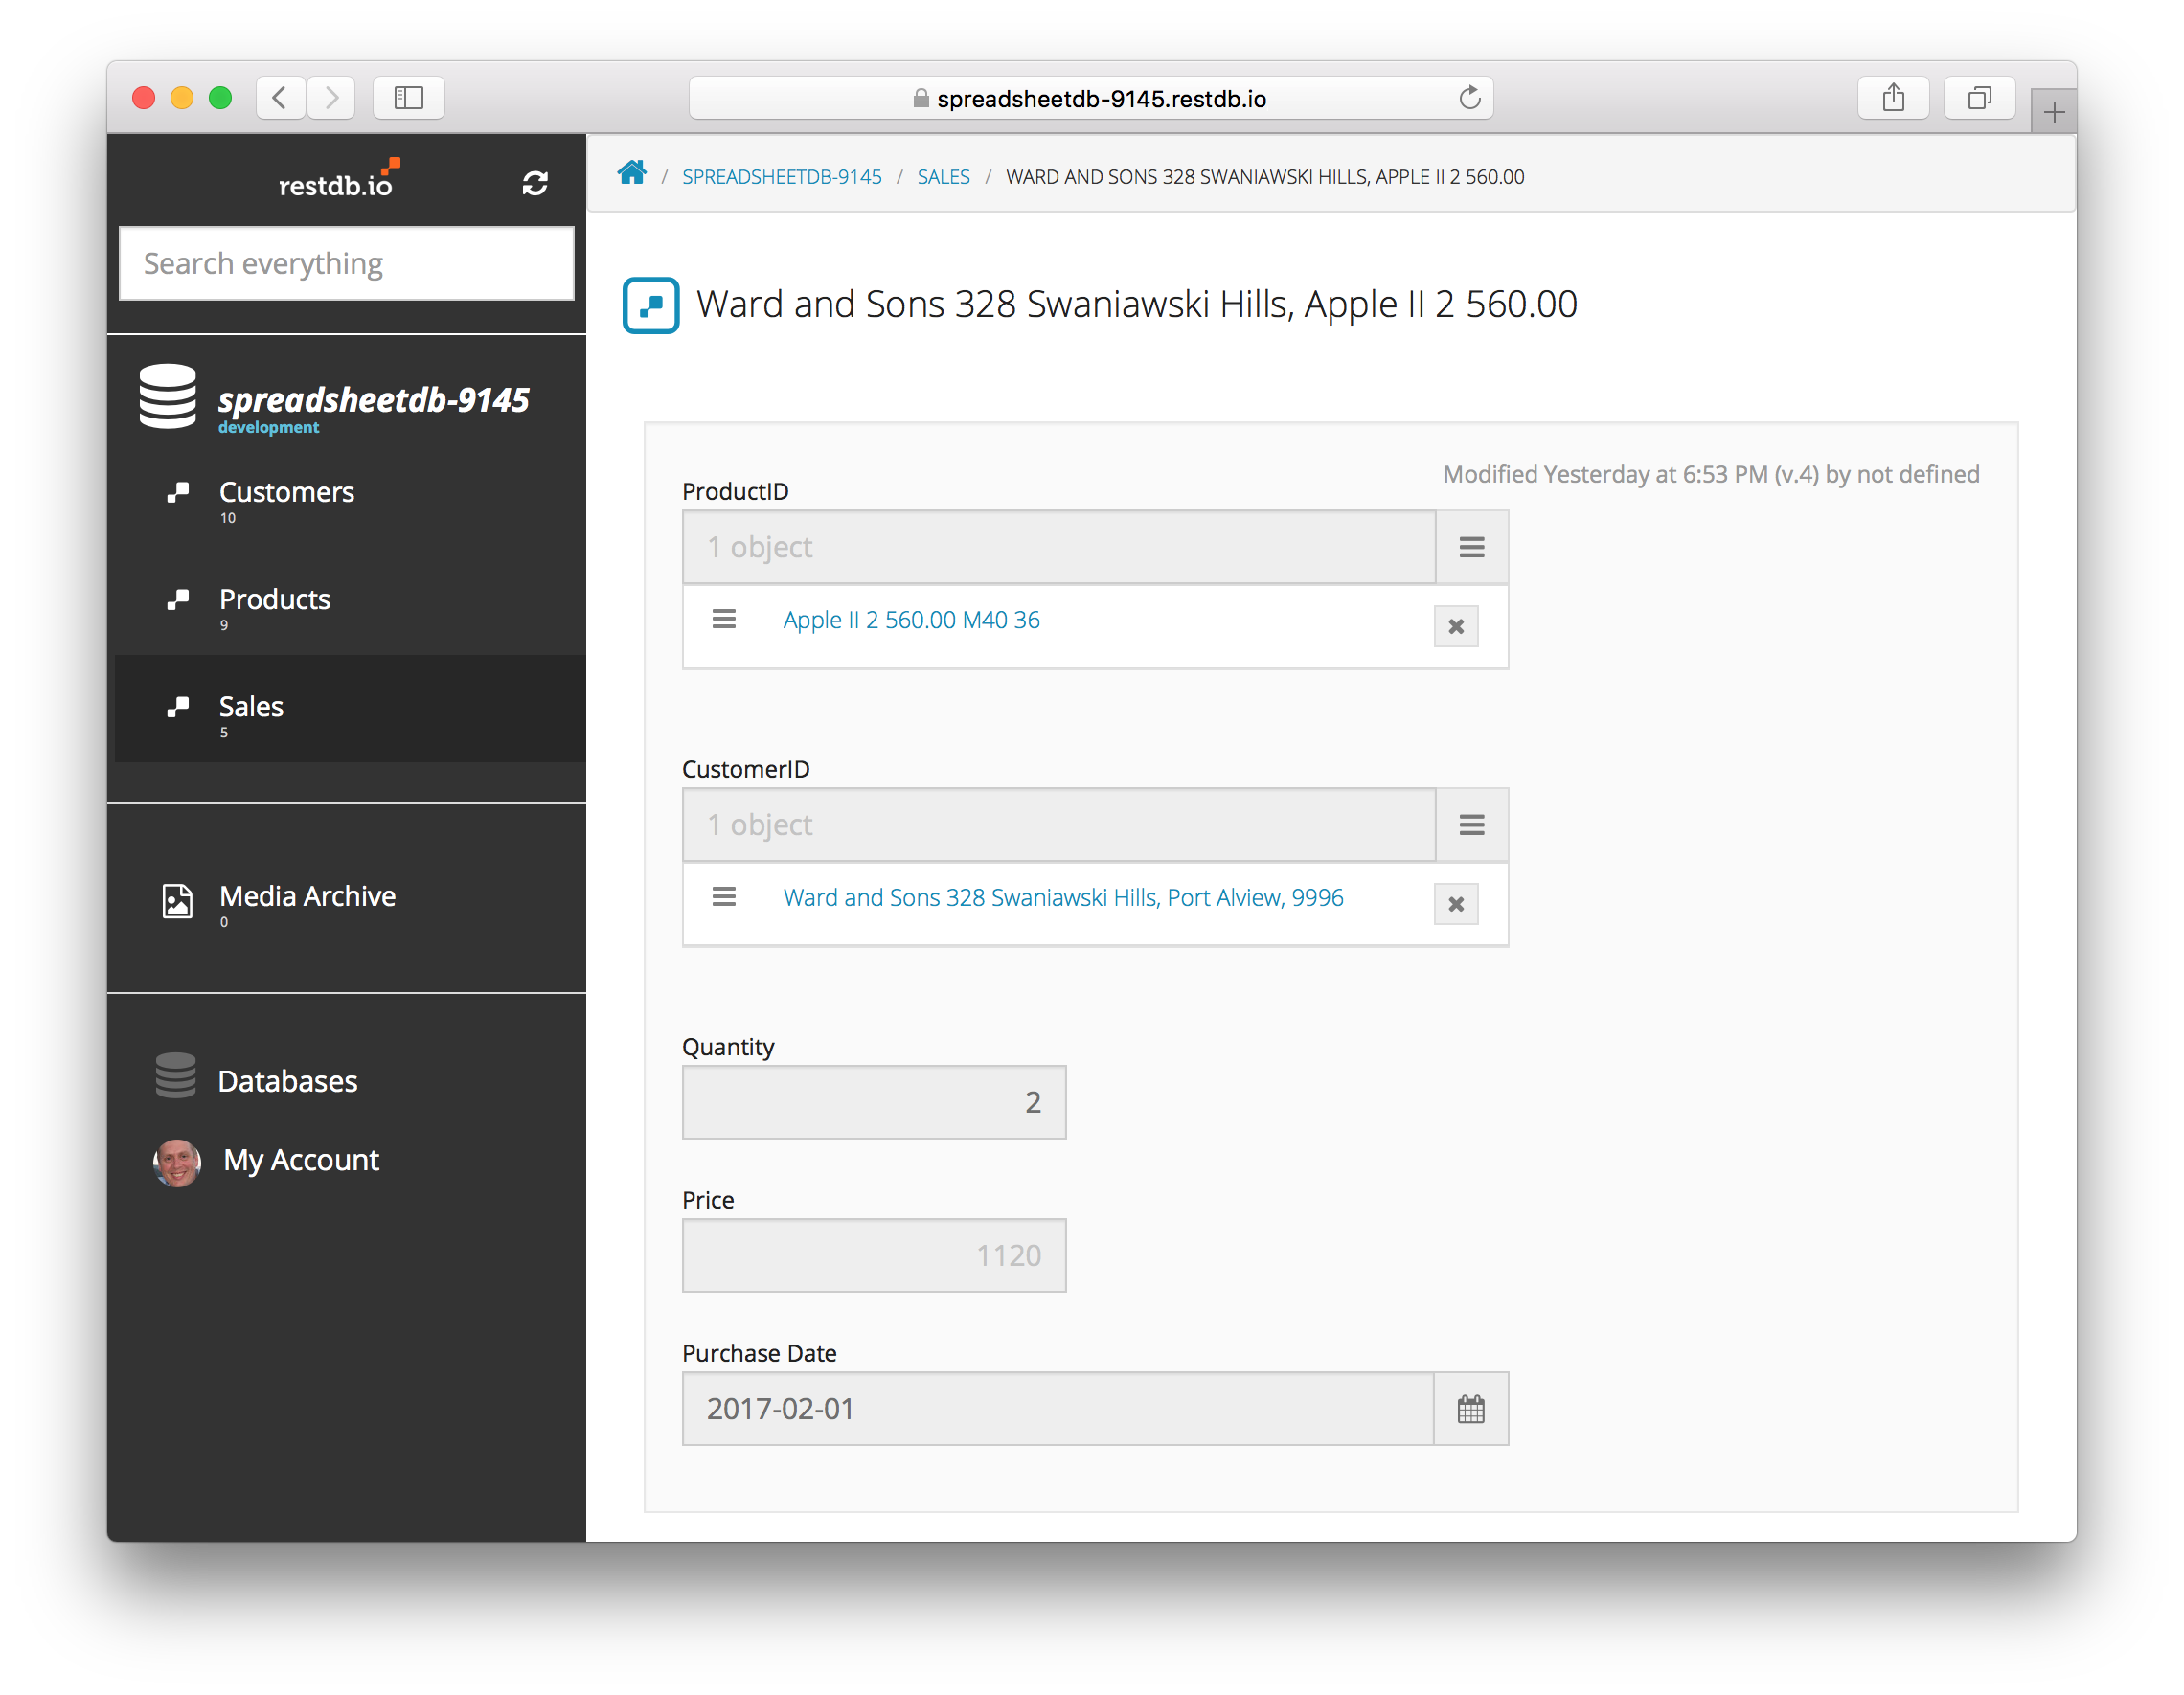
This concludes our mapping of data and formulas. If we open a Sales record we can see the finished result. Instead of number ID's we have "live" objects, and instead of manual data entry of prices, it's automatic.
The Sales collection list view shows that we have a consistent data view of sales, products and customers.
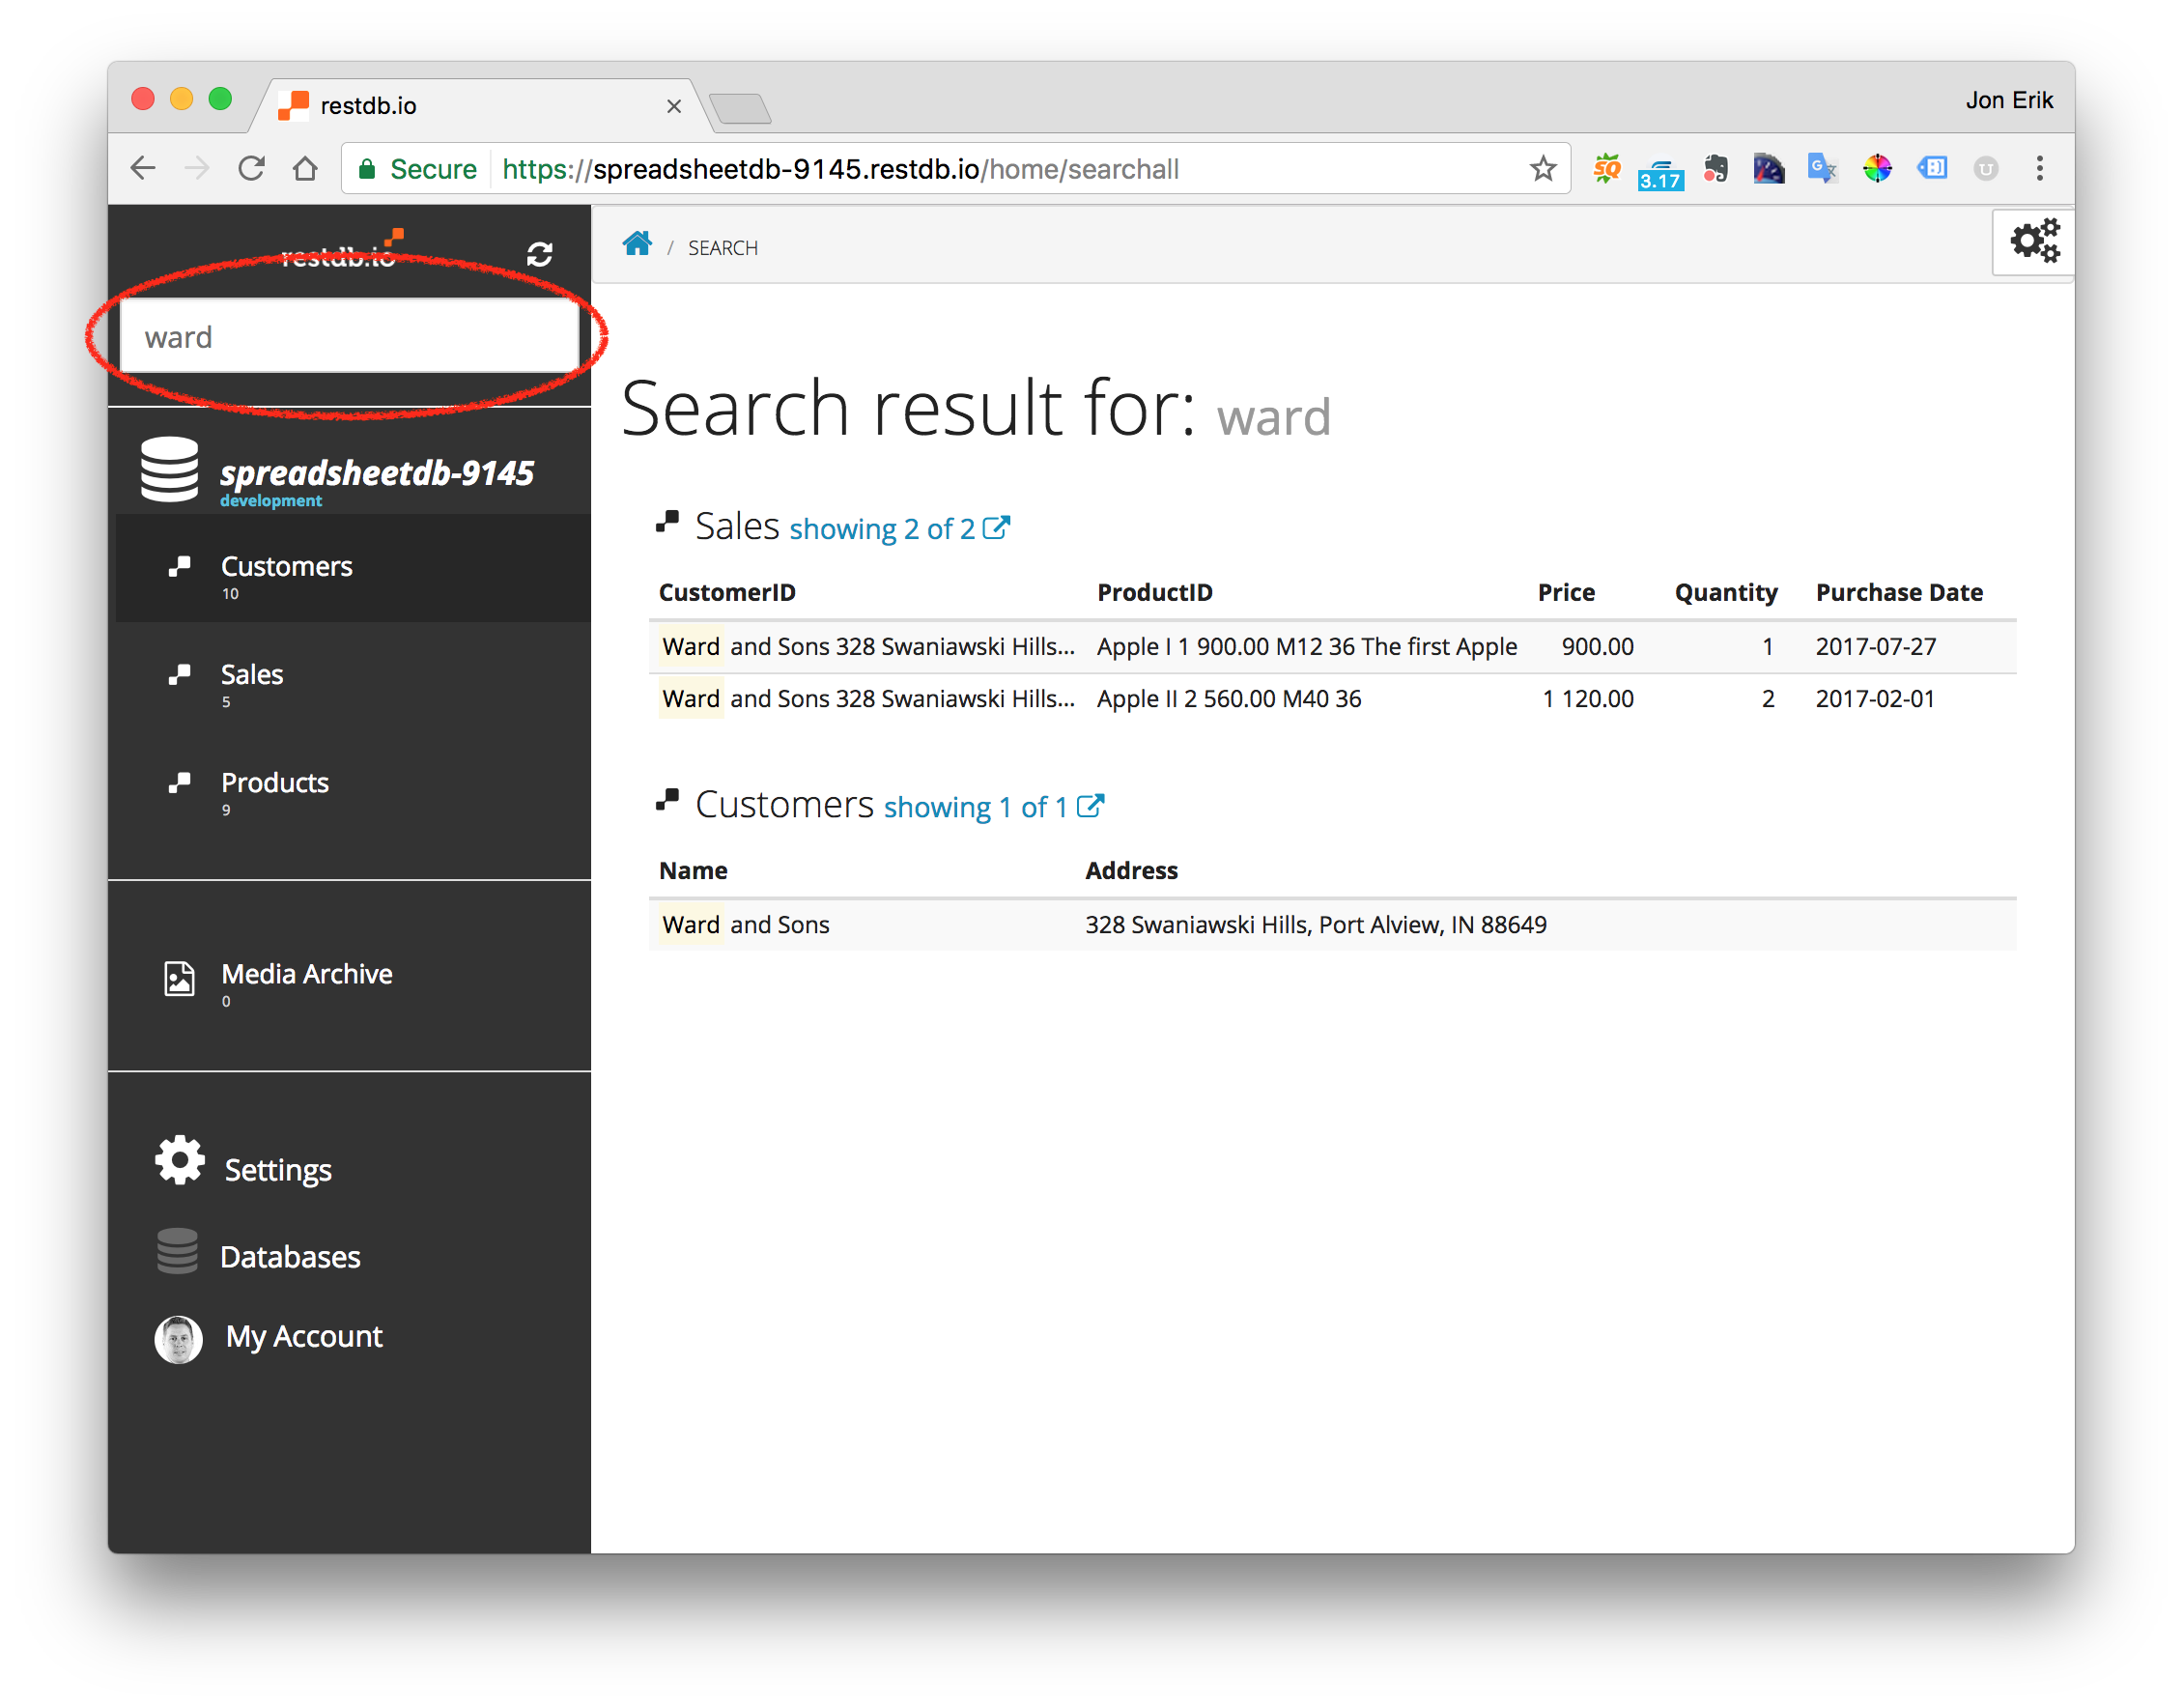
One of the benefits with a database are the search capabilities. We can do a global search, e.g. for a customer named ward*, and the system instantly finds any related item for us. This example search shows that Ward and Sons has 2 purchases in the Sales collection and 1 entry in the Customerscollection.
4. Set up users and access roles
Role based access control is particularly useful when you need to restrict access to what users can see and do in the data manager in your database (read documentation).
The database owner/creator can invite and manage external users to the database. There are 3 types of admin levels for users:
- Administrator
- Developer
- User
Administrators and Developers can change the dataschema invite/delete users etc. Users can only work with data. After inviting a new user we can assign them different roles. Roles are tags that we can assign to a particular "access right" later. We have invited 2 external users to our database. Lets assign 2 different roles to our users: manager and apprentice.
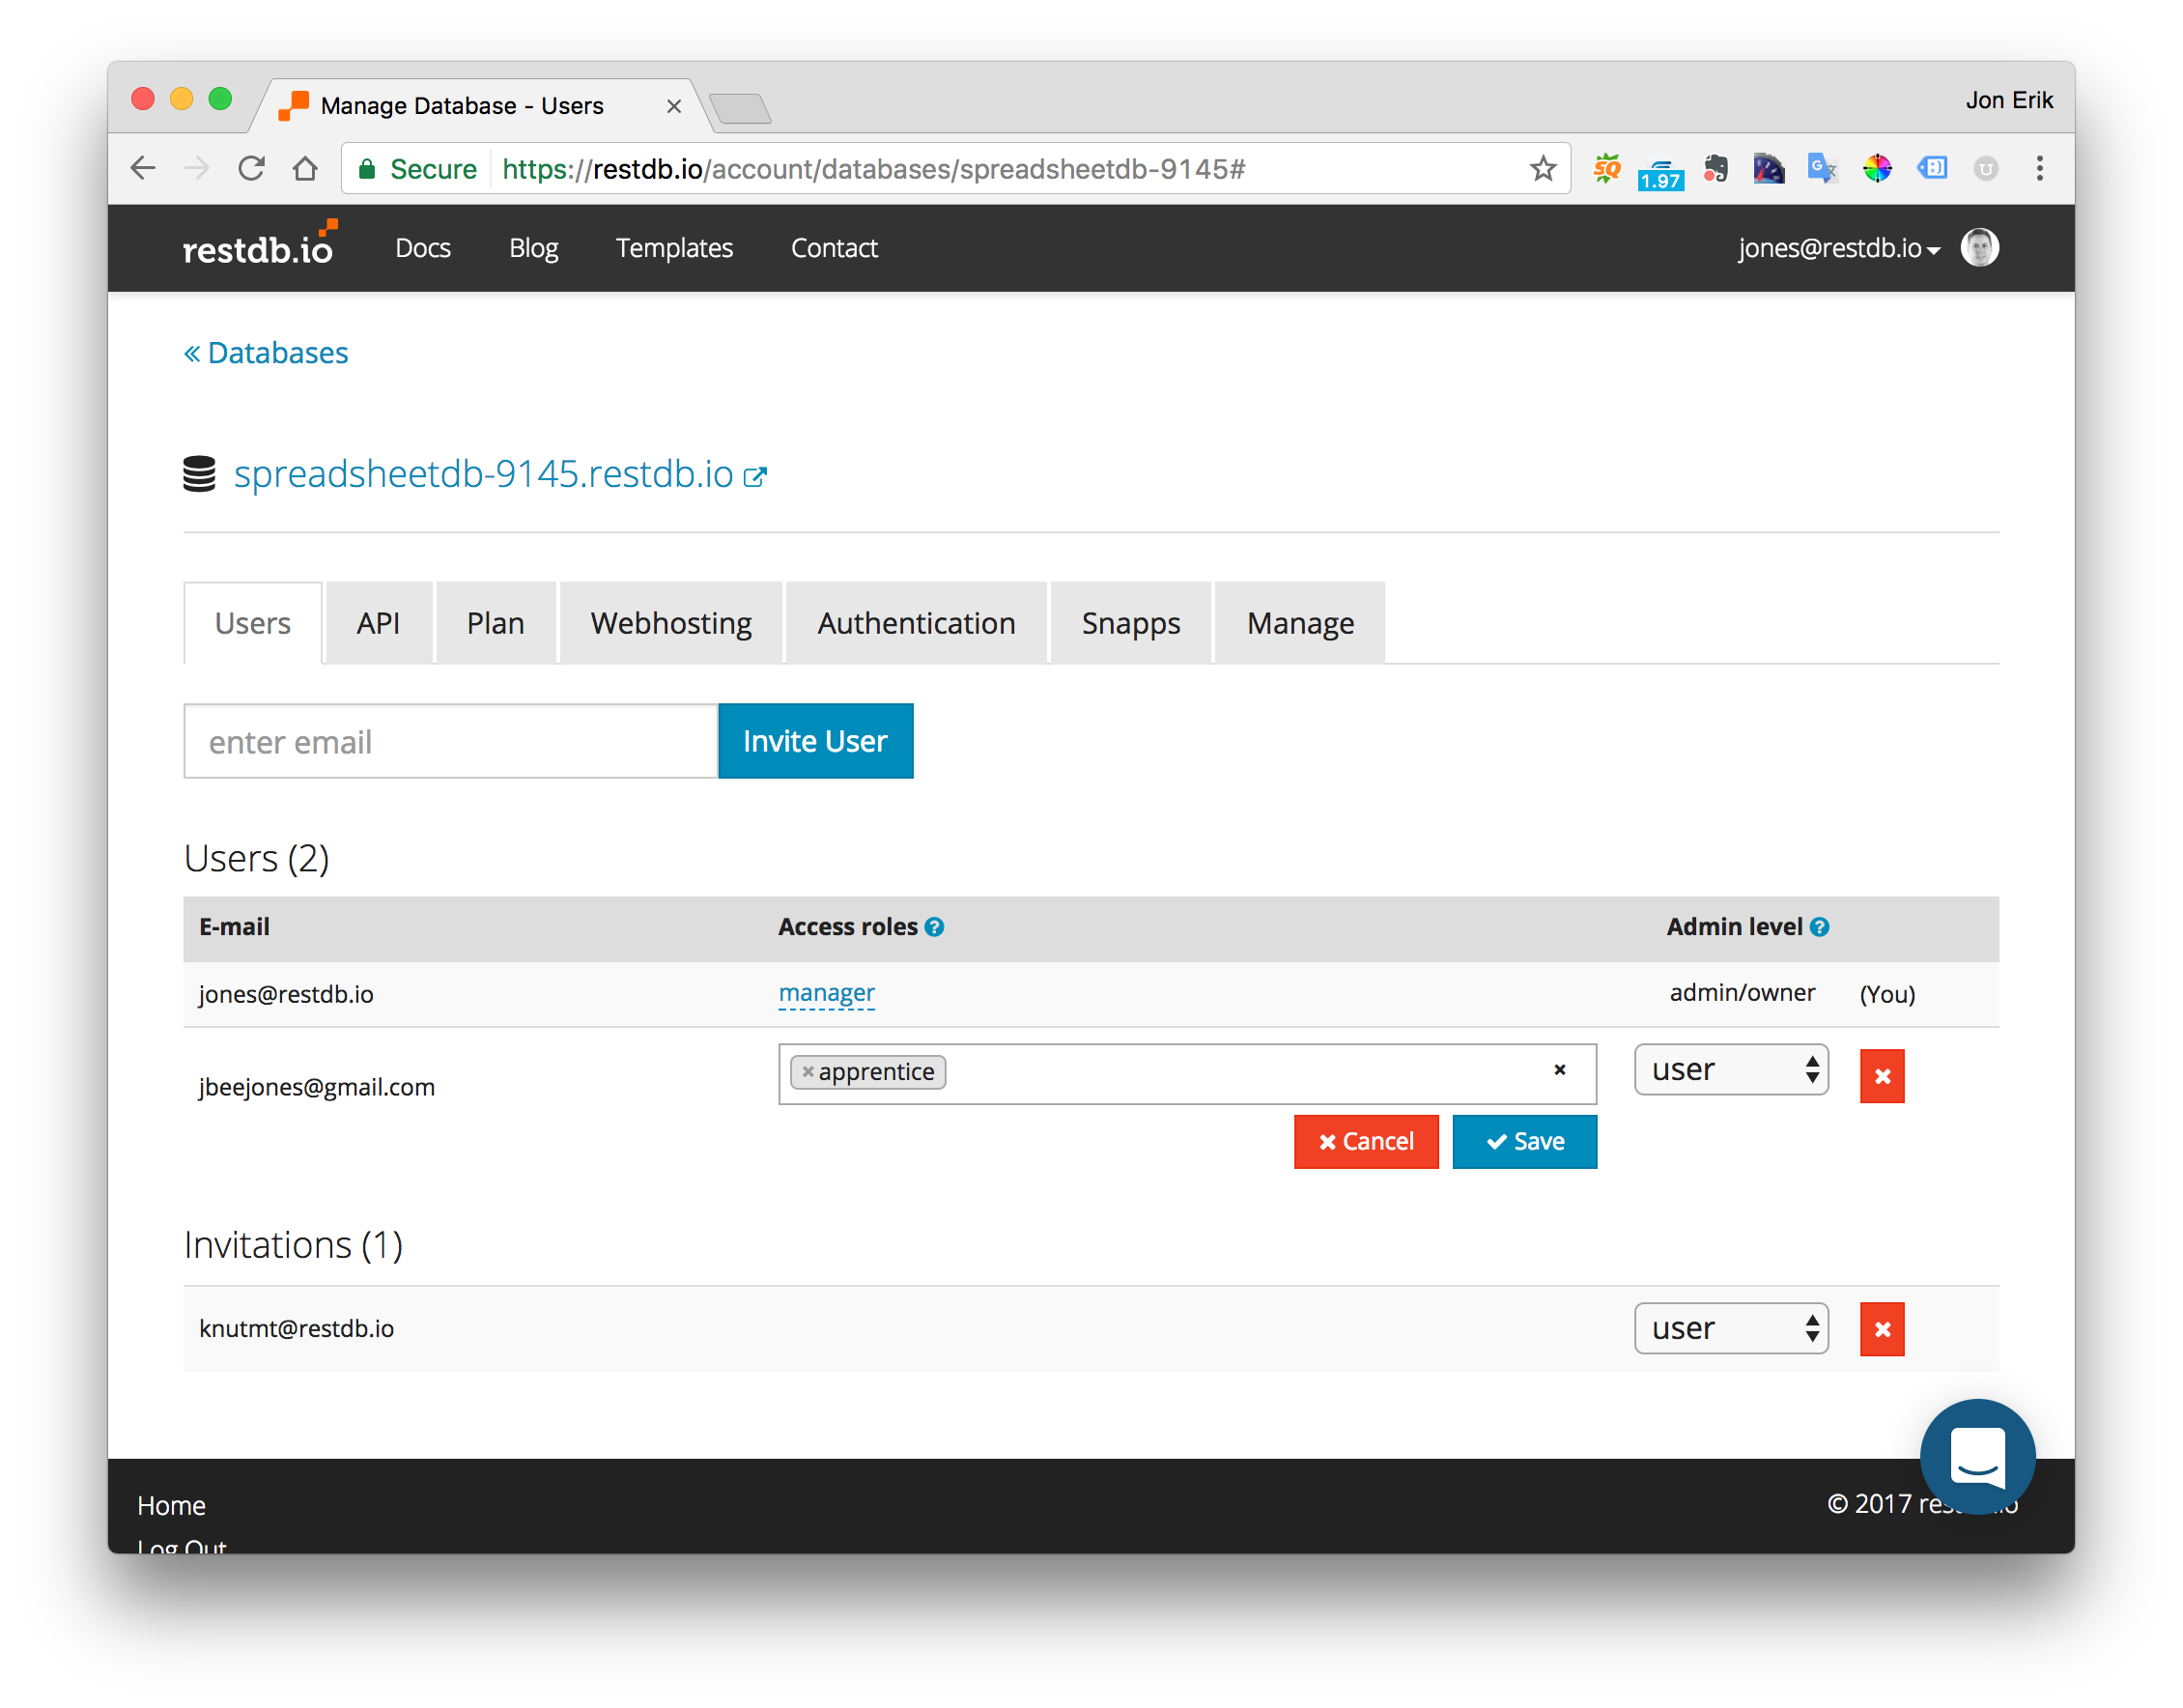
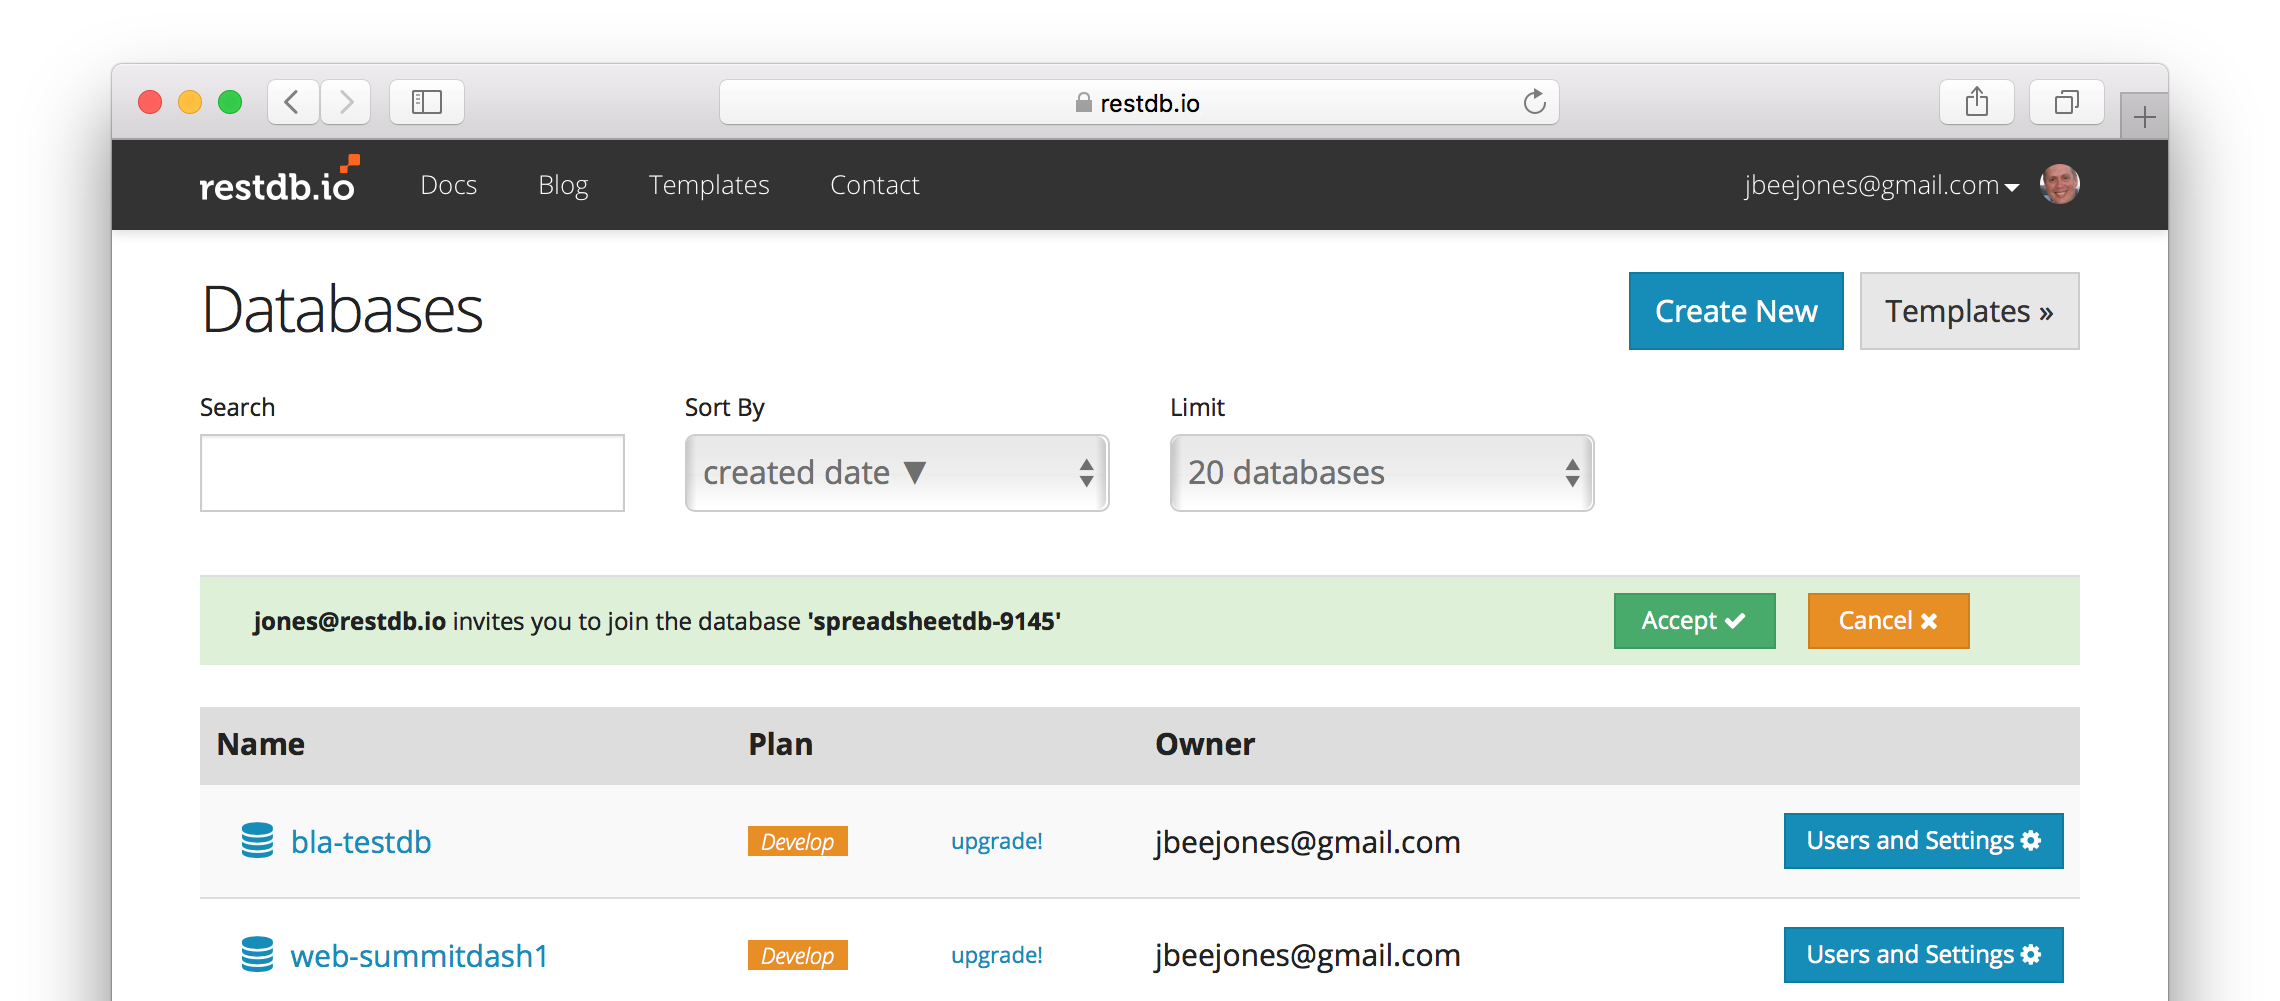
Invited users gets an email with a link to their account. Accepting an invite grants access to the database with the given roles managed by the database owner.
Setting access right for users/roles are done in the collection settings menu. In our database we wish to restrict access to the Sales collection. We grant full access to managers but only read access to apprentices.
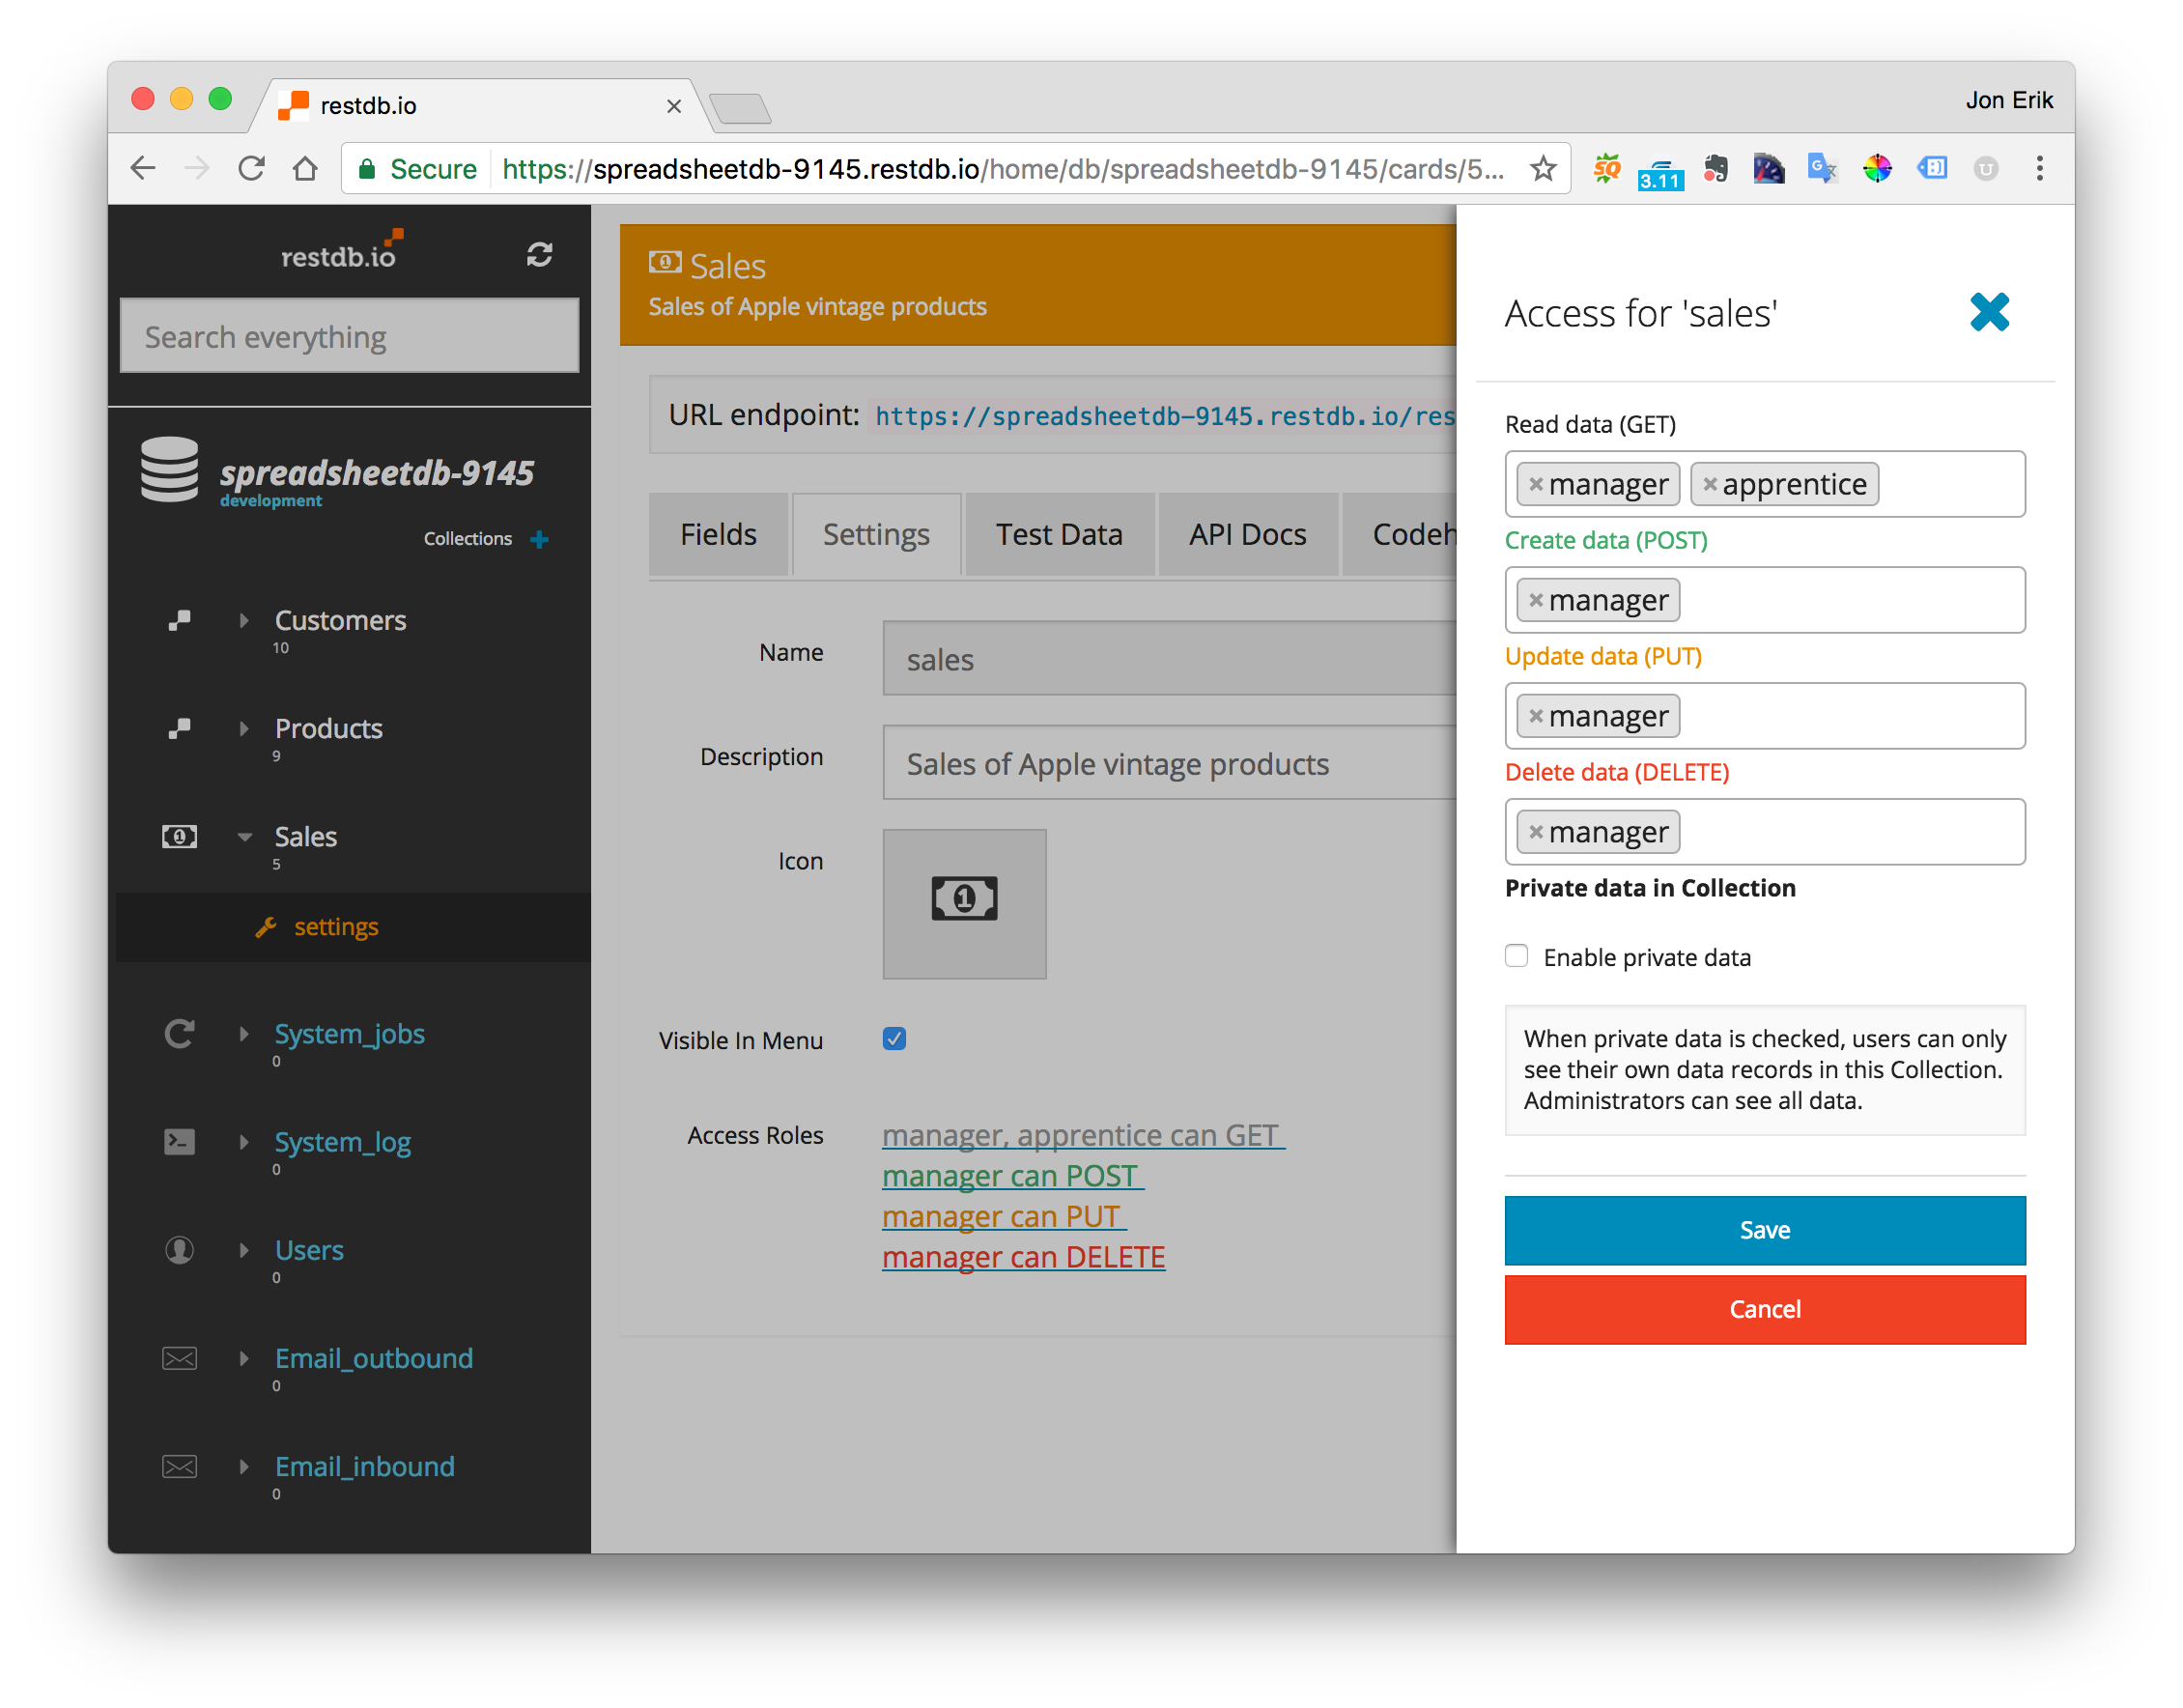
When logging in as a user with the apprentice role, the Salescollection will appear as "read only" due to the access restriction. The screen shot below shows that all the input controls are disabled and there is no Save button.
6. Publish data to web
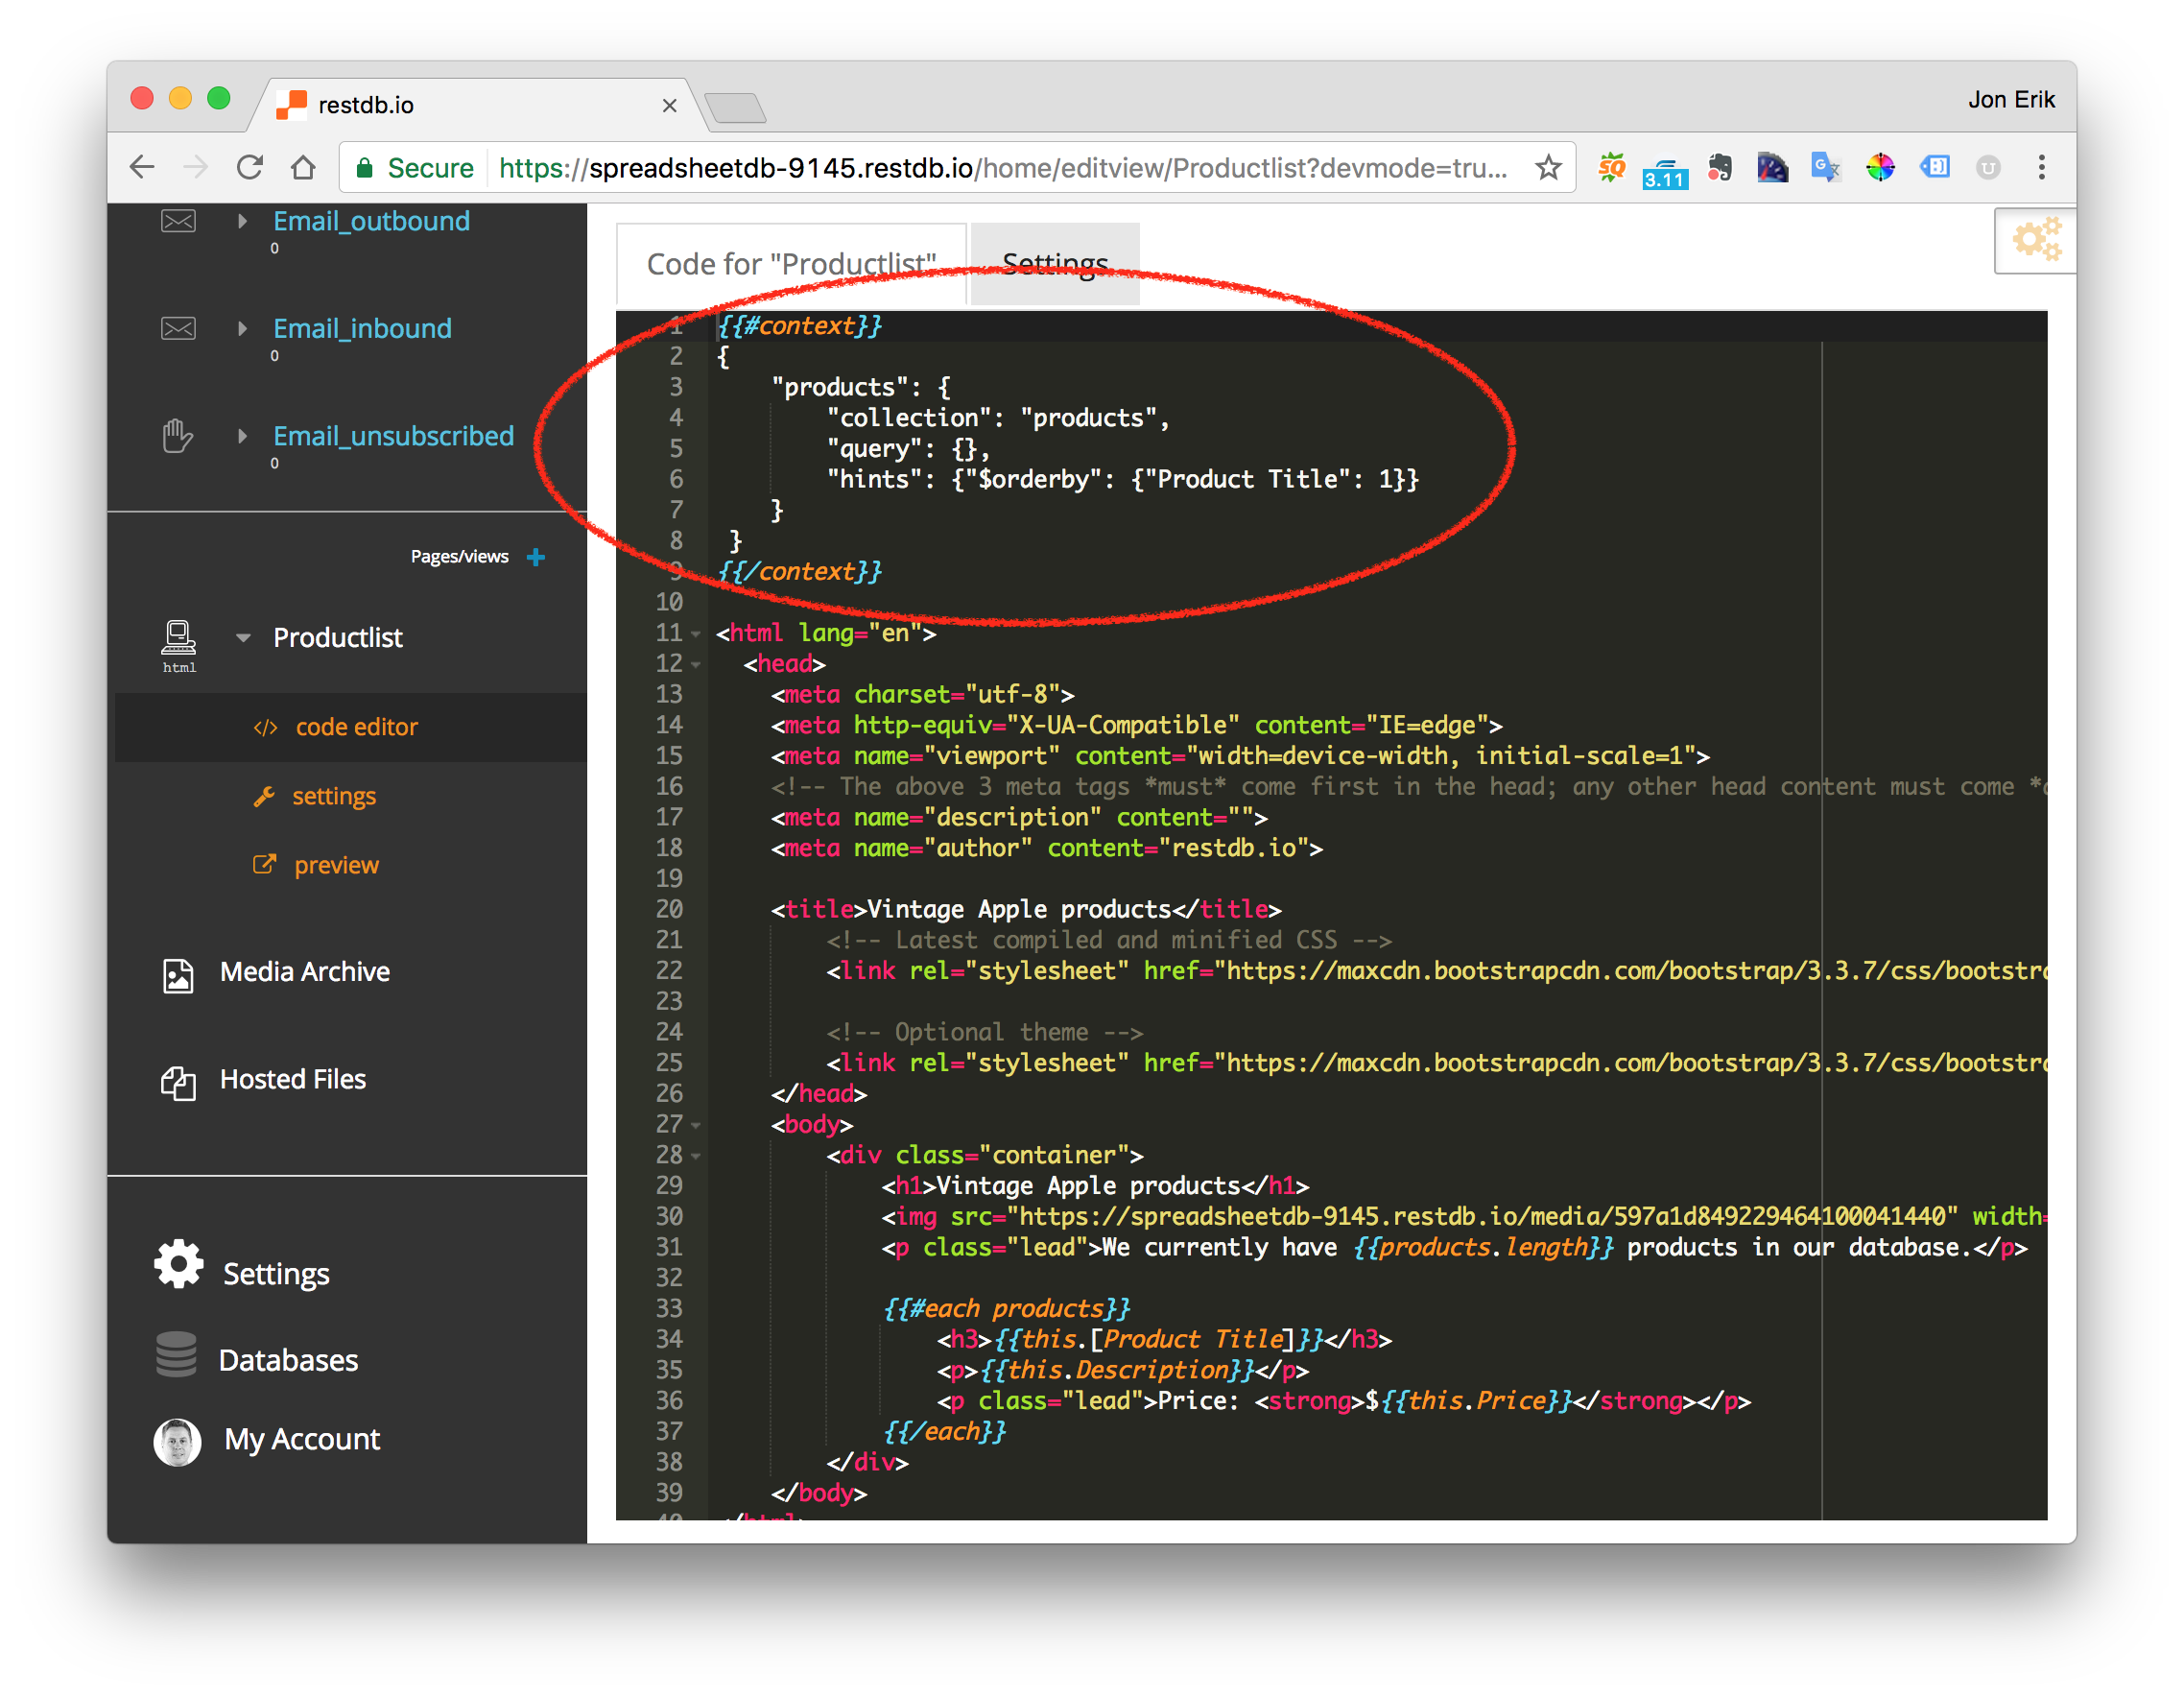
restdb.io lets you create Pages that can be accessed from the external web (pages documentation). Pages can be public or protected with authentication. In this simple example we'll create a public product list. A Page is just HTML with HandlebarsJS support. It can run database queries which provides a data context for the Page. This makes it extremely easy to publish content from the database. The screen shot below shows the HTML code for our product list.
To publish this Page we navigate to the Settings tab and check the "Publish" option.
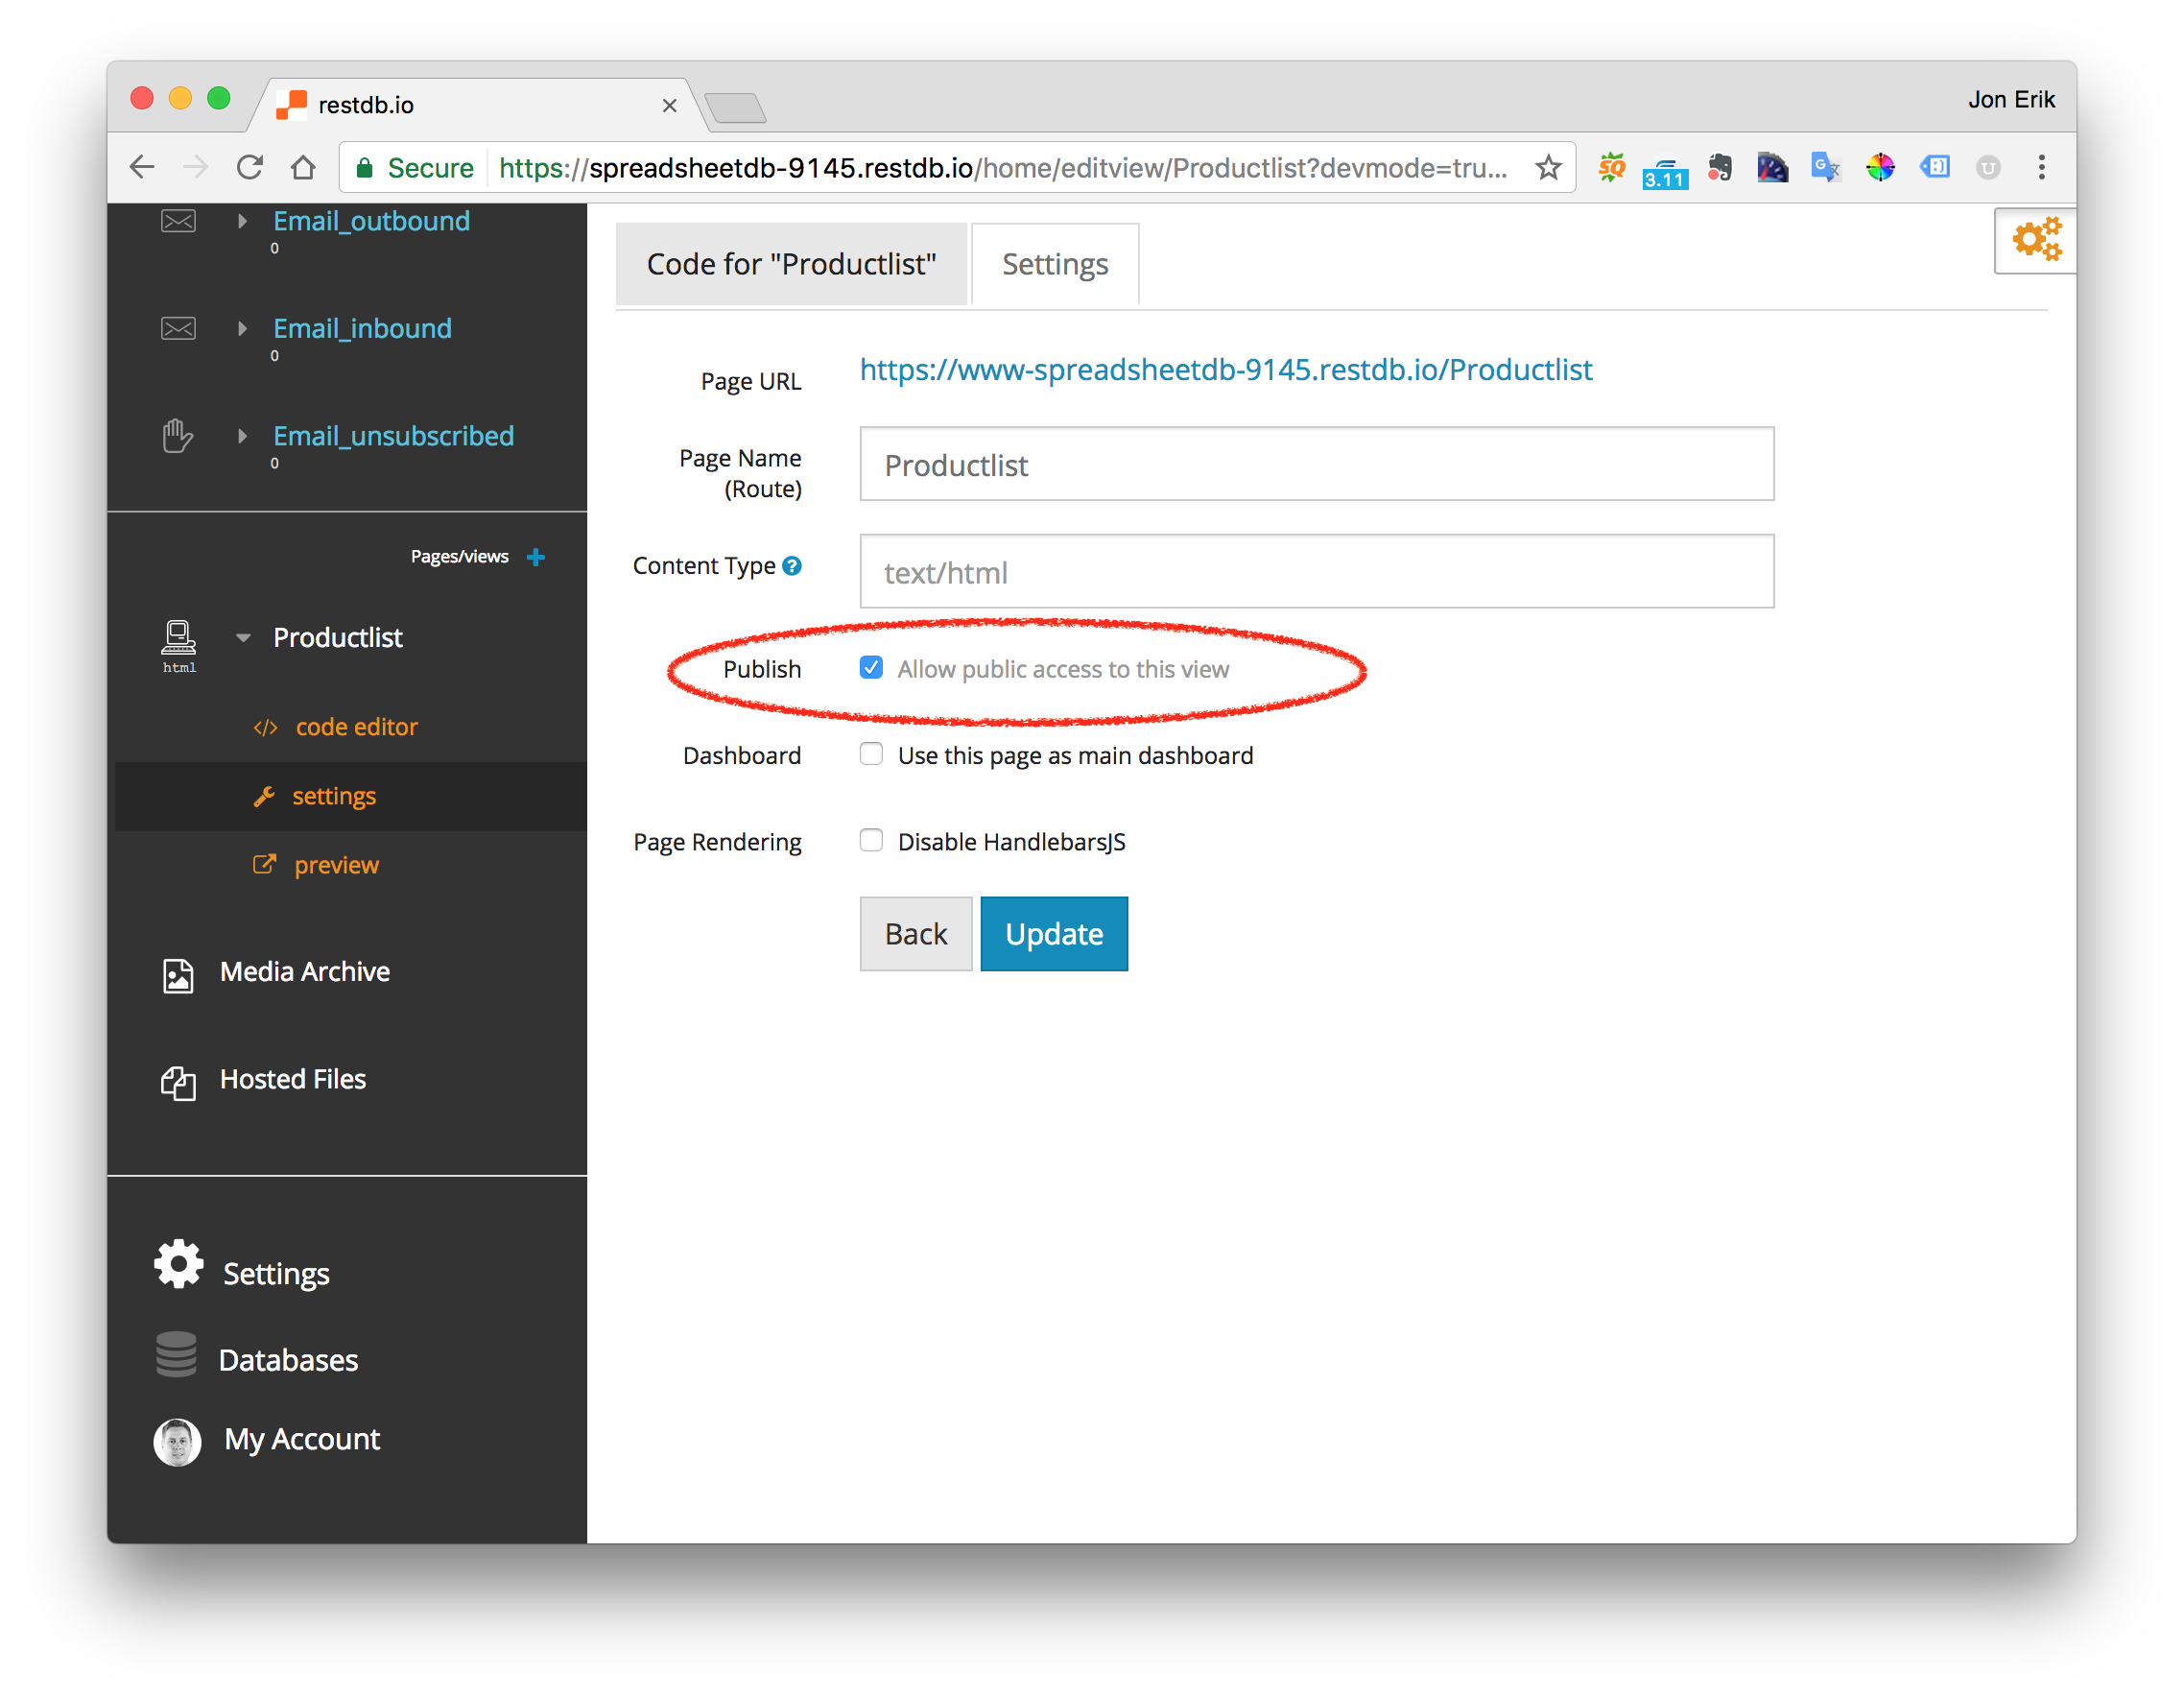
After updating the settings for the page, we can publish our URL to anyone on the world wide web.
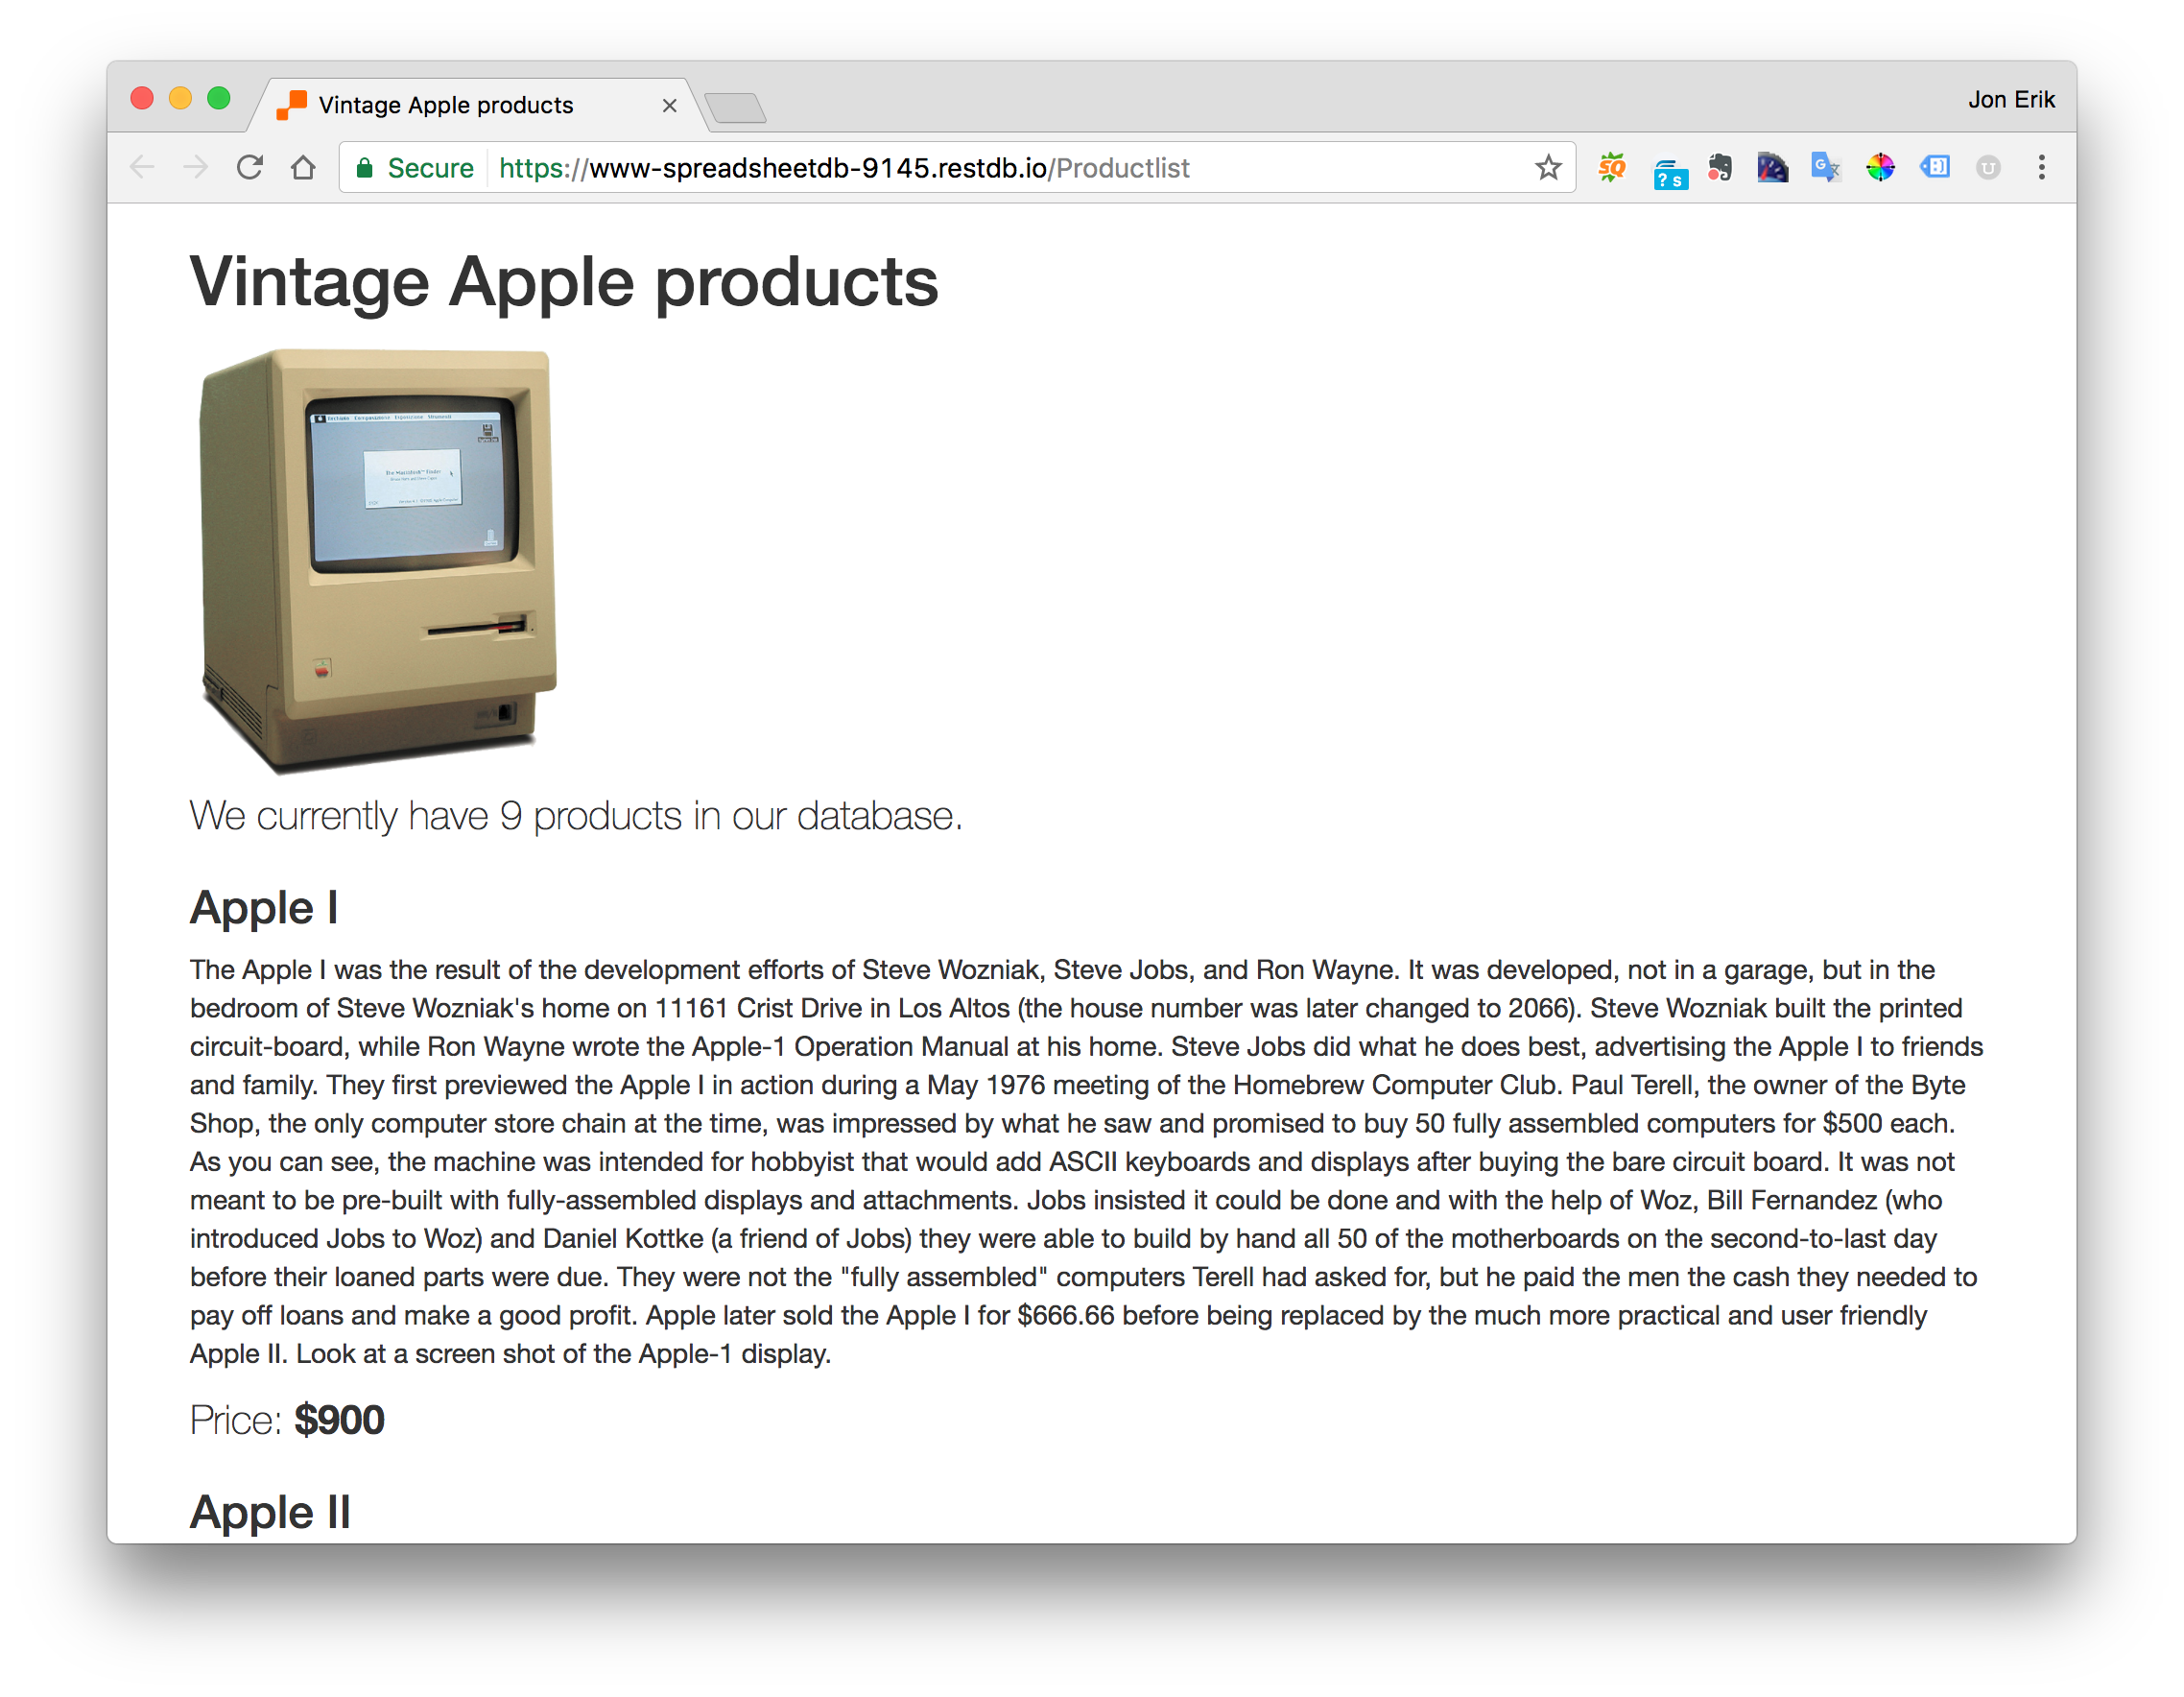
Live demo here: https://www-spreadsheetdb-9145.restdb.io/Productlist
Screen shot of our product list page is shown below.
Summary
I hope this article has shown you that migrating from a spreadsheet "Hell" to a cloud NoSQL database "heaven" is doable, if not easy. Yes, it involves investing some time on preparation and implementation, but this investment will hopefully pay back in increased productivity for your business.
Please feel free to share this article if you enjoyed it!